
Installing the latest iOS update on your iPhone or iPad is typically a breeze. Nonetheless, in some cases, the installation process can result in your device becoming bricked. Fortunately, as long as there is no hardware damage, restoring a bricked iPhone or iPad can be a relatively straightforward process.
If you find yourself in this situation and seeking a solution, search no further. This blog will provide you with several methods for resolving a bricked iPhone or iPad.
When an iPhone is bricked, it means that the device's software has become so corrupted that it is beyond repair, rendering the iPhone as little more than an expensive aluminum "brick". If your iPhone or iPad is bricked, you may encounter one of the following scenarios:
Before delving into how to fix a bricked iPhone or iPad, it's important to understand the underlying causes of a bricked device. There are numerous reasons why your iPhone or iPad may become bricked, with the most common ones including:
Regardless of the reason, having a bricked iPhone can be a frustrating experience, particularly when you need to use your device urgently. In the following sections, we will outline some simple and safe methods for unbricking your iPhone.
Note: It is highly recommended to back up your iPhone before attempting any of these fixes. There is a risk of data loss during the repair process as iOS may need to be restored to factory settings.
Firstly, you should check whether your iPhone has sufficient power to turn on. After plugging the lightning cable, if you don’t view the charging icon in a hour, you may have the issue on charging. You can check the USB cable or charger and see if they are working properly.
If the device still doesn’t turn on when it is fully charged, you need to try the following tips.
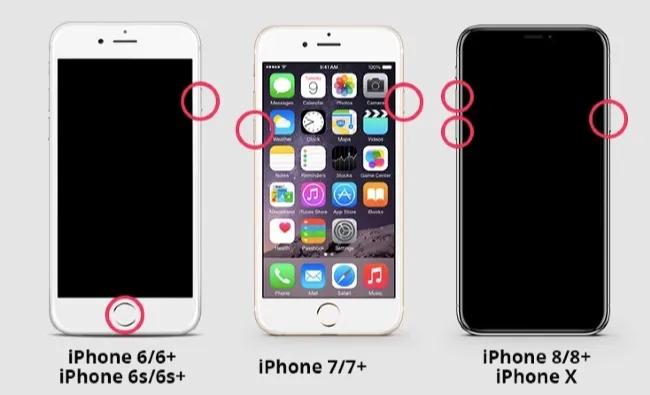
A hard reset is another possible solution for unbricking a bricked iPhone. To perform a hard reset on iPhone 6s or earlier models, simply press and hold down both the Power button and the Home button until the device restarts and the Apple logo appears on the screen.
For an iPhone 7 or 7 Plus, start by pressing and holding down both the Power button and the Volume Down button simultaneously. Release both buttons when the Apple logo appears in the center of the screen.
If your iPhone or iPad doesn't have a home button (iPhone 8 or later), you can perform a hard reset by quickly pressing and releasing the Volume Up button, followed by quickly pressing and releasing the Volume Down button. Then, press and hold the Power button for several seconds until the Apple logo appears.
If you have performed a hard reset, the iPhone may either boot back into iOS or return to the "connect to iTunes" screen. If you still see the "connect to iTunes" logo again, try to restore the iPhone with iTunes.
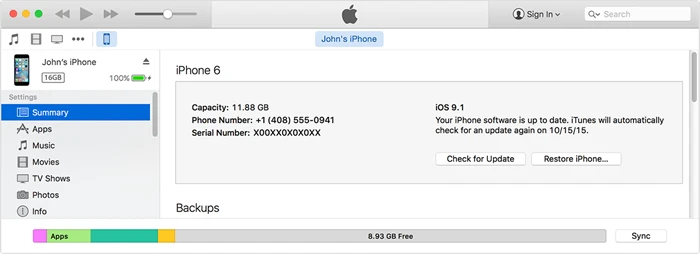
If you get an error message when attempting to restore the iPhone via iTunes, the next step to unbrick iPhone is to connect the bricked device to the computer and put it into DFU Mode.
Step 1. First you need to connect the bricked iPhone to computer, open the iTunes/Finder and then follow the steps below to put the device in DFU mode.
Step 2. Subsequently, iTunes/Finder should detect the bricked device and pop up a notification indicating that the device has successfully entered DFU mode.
Step 3. Click Restore and the newest firmware file will be installed on your device. Please keep the device connected to the computer until the installation process is complete.
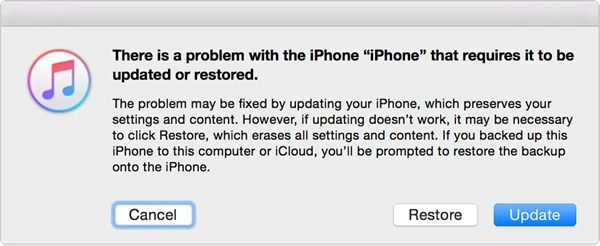
What you should note is that the restore process will completely wipe out your iPhone data unless you have previously backed up the device with iTunes or iCloud. So ,we strongly recommend you using an alternative method to fix the bricked iPhone issue without data loss.
With the assistance of FoneGeek iOS System Recovery, all the data will still be retained after the repair process. And it works well on both your Windows and Mac computer.
FoneGeek iOS System Recovery - Instantly Fix iPhone Bricked Issue without Data Loss
It is 100% secure and easy to use FoneGeek iOS System Recovery to resolve the issues that you may have on your iPhone. Download this tool to your computer and then follow the steps below to continue.
Step 1. After installing and launching the iOS repair tool from FoneGeek official site or clicking the download button above. Connect your bricked iPhone to the program and select the repair mode of "Standard Mode".

Step 2. The bricked iPhone will be detected by the program. Or you can Simply put your bricked iPhone into DFU mode based on the instructions on the interface to get the iPhone detected.
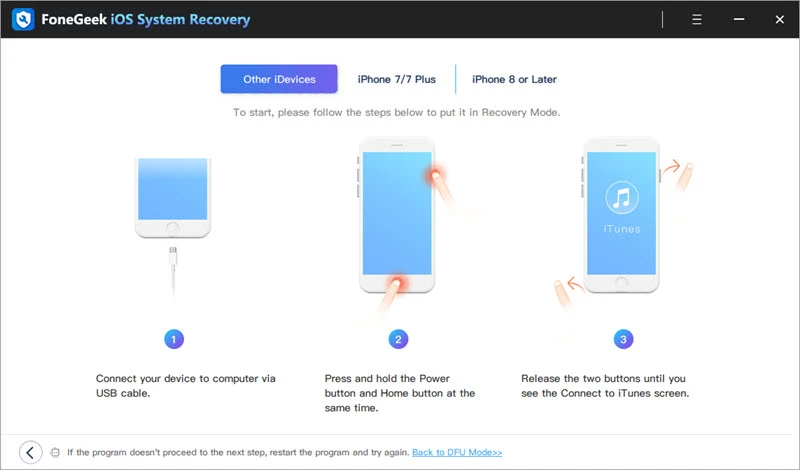
Step 3. Then you need to select your device models and iOS version then click on "Download" button after ensuring that the device details are selected.
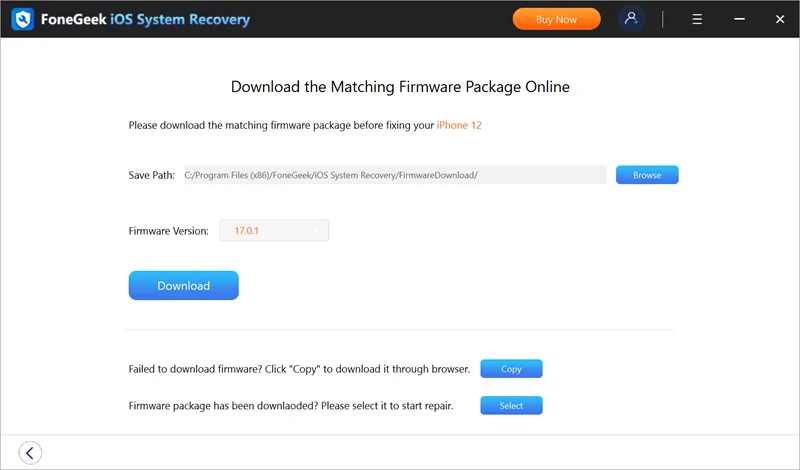
Step 4. The FoneGeek repair program will start to download the firmware package for your iPhone and repair the priced issue.
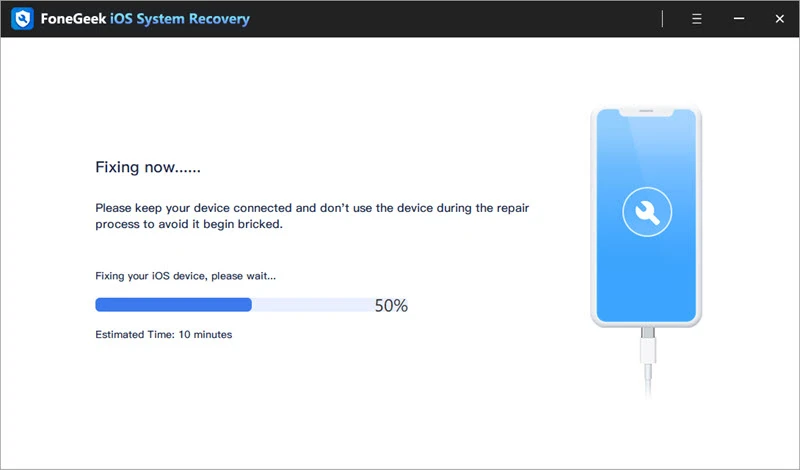
After the problem is fixed, your iPhone will start as normal. You can now disconnect your iPhone from the computer or click "Try Again" to repeat the repair progress.
If you still cannot get the bricked iPhone back to normal, there may be some hardware issues with the device. In such case, you'd better take your iPhone to the local Apple Store and have it repaired. However, it's likely that the iPhone accessories may be replaced.
The suggestions above will help you get rid of the issue like a bricked iPhone. The next time you have the same issue or other iOS issues on your iPhone or iPad, you can still try the solutions above.
If you want to fix your bricked iPhone after an update without losing any data and achieve a high success rate, then you cannot overlook FoneGeek iOS System Recovery. This tool is highly effective in resolving a wide range of iPhone update-related problems. Download it and have a try.
Fay J. Melton has explored the area of technology and software for more than 5 years and he is enthusiastic about helping users solve various technology issues.
Your email address will not be published. Required fields are marked *

Copyright © 2025 FoneGeek Software Co., Ltd. All Rights Reserved