
 User Concern
“This morning, I tried to update my iPhone 13 Pro Max from iOS 16.1.1 to iOS 17.0.2. At first, it looked like it was working, and now it's just sitting on 'Update Requested' in the status sections.”
The iOS 17, which comes with many features that enhance efficiency and security, has finally been released for all users. When a new iOS update is available, your iPhone has to send a request to the Apple server to download the update before it can be installed.
However, many users complanied that their iPhones are stuck on the "Update Requested" screen while trying to install iOS 17. If you have encountered the same installation problem, keep reading. Here we will explain why your iPhone is stuck on Update Requested and share 11 effective tips to fix the issue in no time.
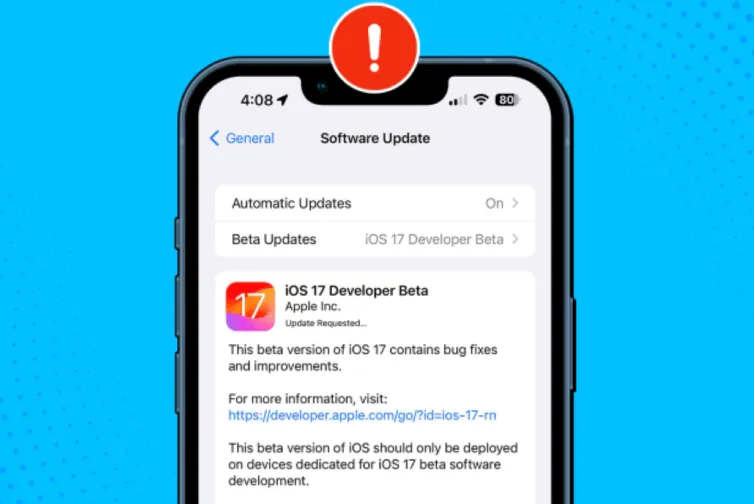
On your iPhone, go to Settings > General and click Software Update. The device will immediately check for the iOS update. If a new iOS update is available, you can click the Download and Install button to begin updating.
When your iPhone connects to the Apple Server and sends the request to download the newest iOS update file, the message Update Requested will display on the screen. Unfortunately, many users reported that their iPhones have been requesting the software update for a long time.
After testing the update of iOS 16 to iOS 17, we found that the time we spent on the Update Requested was less than 5 minutes. However, the time may be different due to various factors, such as the device storage space and network connection. Ensure to connect the device to a steady and high-speed network before updating the iOS version.
Your iPhone may stuck on the Update Requested screen for multiple reasons, and below are some possible causes:
Your iPhone may get stuck on iOS Update Requested or encounter other update-related issues due to poor or no Wi-Fi connection. If the Wi-Fi connection is unstable, it can disable the iPhone's access to the Apple server, preventing it from downloading the iOS update.
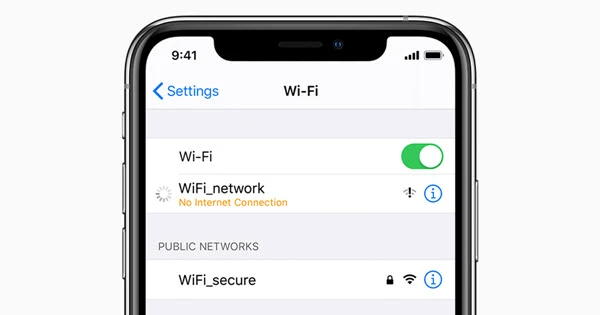
Another working way to fix the iOS 17 update stuck on the Update Requested screen is to enable the Airplane Mode and then disable it. This will help to refresh the network connection and make it easier to download iOS 17 update files.

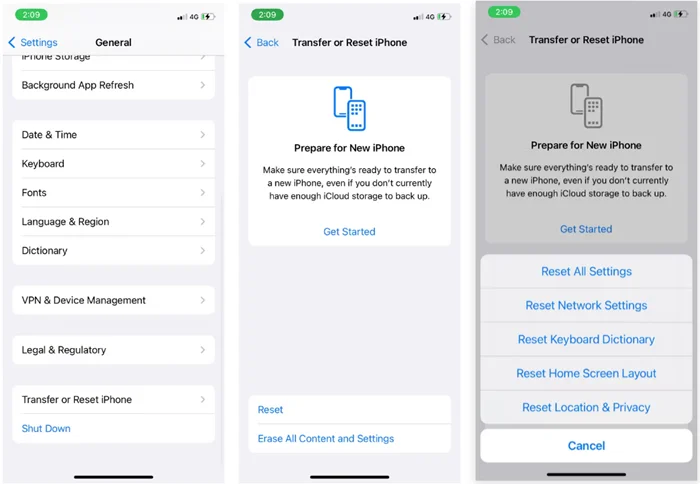
If your iPhone is stuck on iOS Update Requested due to network issues, you can try to reset the network settings on your iPhone. This can help to fix even complex issues related to the wireless network.
Go to Settings on your iPhone and tap General > Transfer or Reset iPhone > Reset > Reset Network Settings. Then, enter your device's passcode and tap Reset Network Settings to confirm.
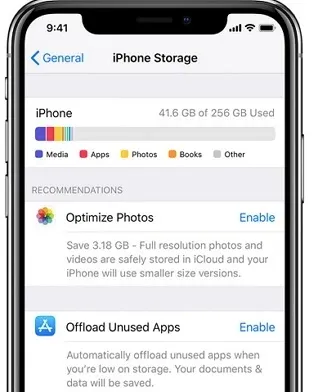
If your iPhone does not have sufficient storage space, the iOS update process will not work smoothly and will get stuck on the Update Requested screen. In this situation, you can free up some space on your iPhone to install the new iOS 17 update.
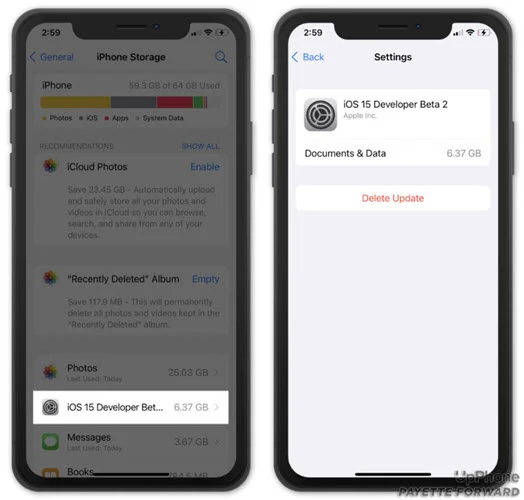
Go to Settings > General > iPhone Storage and check the free space in your iPhone. If the device is low on storage space, then try to delete some useless apps and multimedia content.
If you clean up iPhone storage but it still gets stuck on the Update Requested screen, you can try deleting the iOS update and re-downloading it.
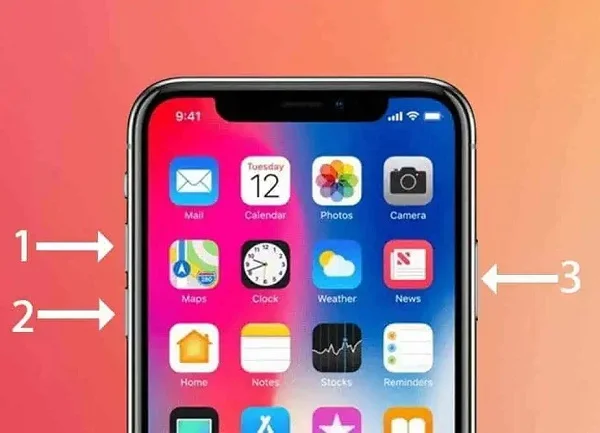
Your iPhone may get stuck on Update Requested due to minor software glitches on the device. In such a case, you can try to hard reset your iPhone to delete the glitches.
Here's how to do it: Press and quickly release the Volume Up button, then the Volume Down button, then press and hold the Side button until the Apple logo appears.
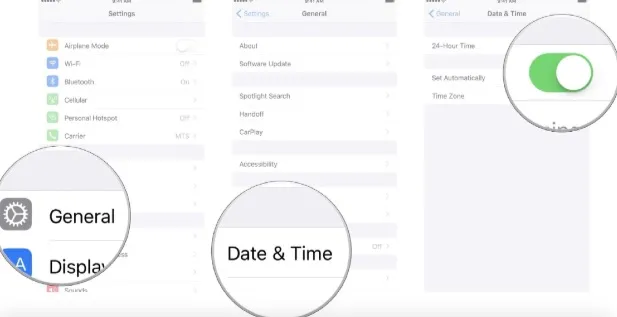
To download the newest iOS version without issues, it's important to set the date and time correctly. Here, we suggest setting it automatically by following the steps below:
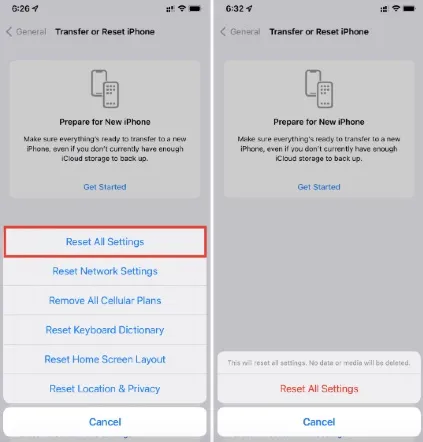
If your iPhone is still stuck on Update Requested after hard rebooting the device, we recommend resetting all settings. This will restore all settings to factory defaults and fix some deeper software problems.
To do that, head to Settings > General > Transfer or Reset iPhone > Reset and tap Reset All Settings. Enter your iPhone passcode when requested and tap Reset All Settings again to confirm the action.
If your iPhone has been stuck at Updated Requested for several hours and you have tried the methods above but still haven't solved the issue, you might try performing the iOS 17 update using your computer instead of the iPhone Settings app.
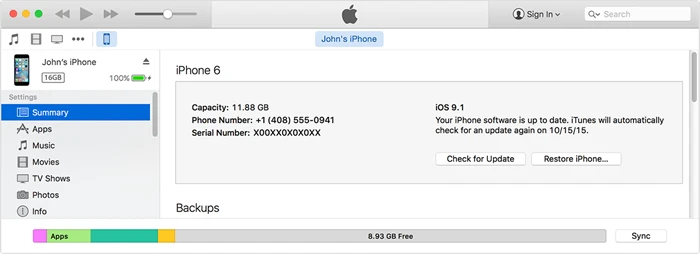
Is your iPhone still stuck at Update Requested? Or you want to install the iOS 17 update without using iTunes? You can try reliable and easy-to-use tools like FoneGeek iOS System Recovery. This tool is frequently mentioned and used to repair iOS issues or install update files on your iPhone/iPad.
Key Features of FoneGeek iOS System Recovery:
To have a deeper knowledge of how to fix the iOS 17 update stuck at Update Requested with FoneGeek iOS System Recovery, you can follow the steps below:
Step 1. Download this iOS repair tool from the FoneGeek official site and install it on your computer. Launch the program and click on "Standard Mode" to proceed.

Step 2. Connect your iPhone using a USB cable and the program will detect the abnormal state of the device.
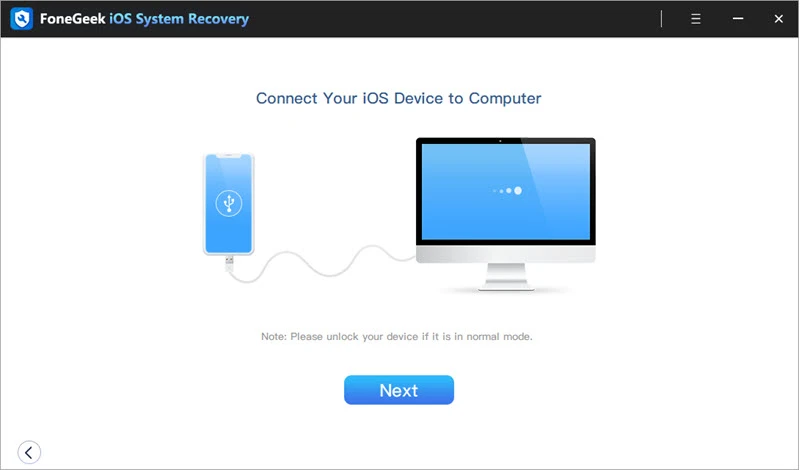
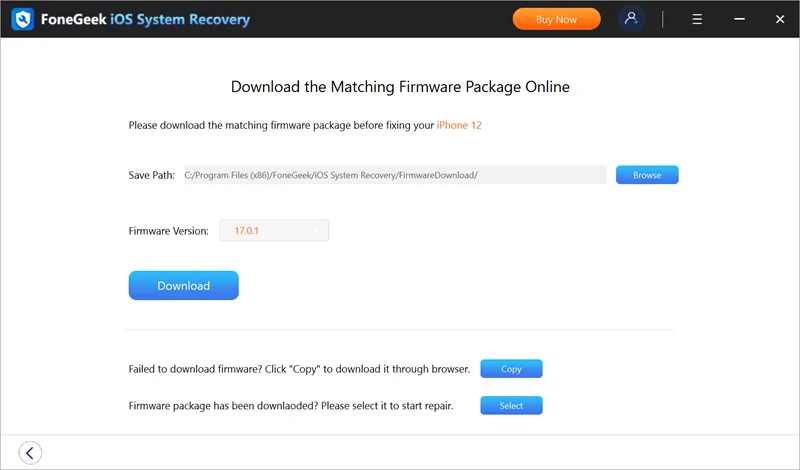
Step 3. After confirming the device information, click the "Download" button and the program will start downloading the firmware package.
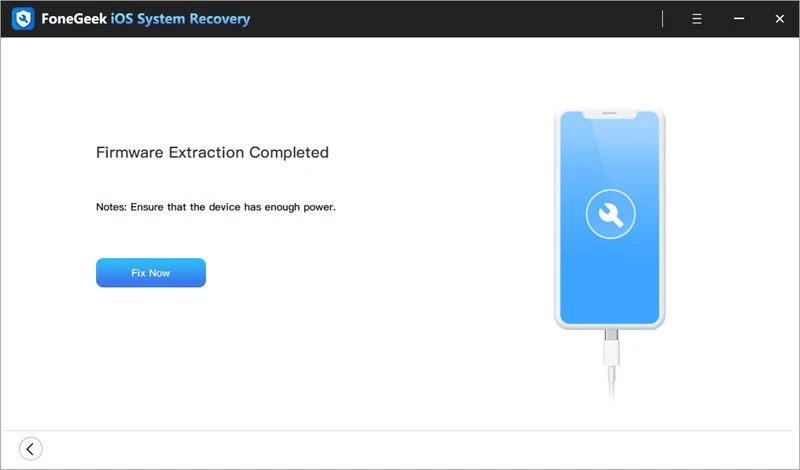
Step 4. Once the download is complete, click "Fix Now," and the program will start fixing the device. Your iPhone will reboot and update to the latest iOS version.
It is easy to use, right? Many media sites have recommended this tool, such as Mobile Mall, GetDroidTips, Inspirationfeed, Techjury, and Pakainfo. Also, it has received many positive feedbacks from global customers.
You can also put your iPhone into DFU mode if your iPhone is stuck on the Update Requested. However, performing the DFU restore will erase all the data and settings on your iPhone and update the device system to the latest version. Thus, it's strongly recommended that you back up your iPhone data before performing the DFU restore.
Here is how to put your iPhone 8 or later in DUF mode:
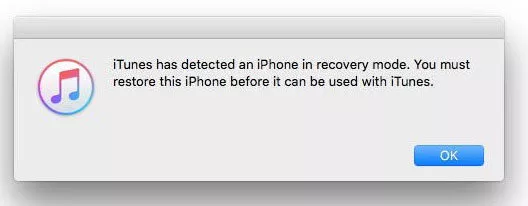
Step 1: Connect your iPhone to a computer and open iTunes or Finder.
Step 2: Quickly press and release the Volume Up button, then the Volume Down button, and then keep holding the Side button until the screen turns black.
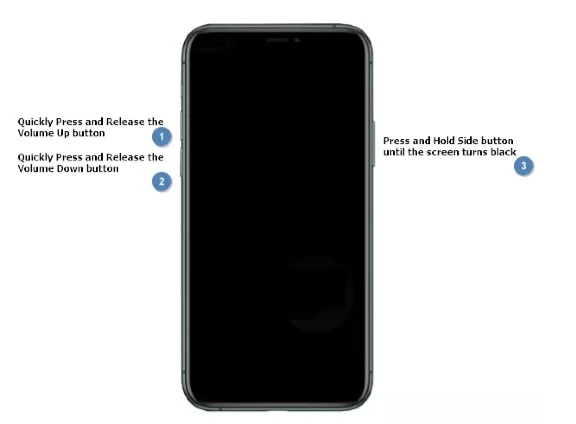
Step 3: Press and hold the Side button and the Volume Button for 5 seconds. Then, release the Side button but continue to hold the Volume Down button until the iPhone appears in iTunes or Finder.
Step 4: Release the volume button, and your iPhone will be in DFU mode. You can now restore your iPhone using iTunes/Finder.
These are the solutions to fix an iPhone stuck on the Update Requested issue. Hope that you have fixed it successfully and your iPhone is finally up to date. While there are various solutions available, FoneGeek iOS System Recovery stands out as the most reliable option. It is able to resolve many iPhone update issues and other iOS glitches without data loss. Additionally, it supports direct upgrades to iOS 17 or other iOS versions.
As a professional writer who is interested in technology, Edwin J. Parke has helped thousands of users by offering various tips to solve their problems.
Your email address will not be published. Required fields are marked *

Copyright © 2025 FoneGeek Software Co., Ltd. All Rights Reserved