
 User Concern
“After updating my iPhone 16 to iOS 18, I encountered a very strange problem. I can no longer send SMS through my iPhone. Is anyone else having this problem? Are there any suggestions?”
Well, there are many bugs in iPhone messages after the new release of iOS 18. According to the complaints we received from users, what they mentioned most is iPhone won't send or receive text messages.

The iPhone not sending message issue can be caused by multiple factors. Below are some of the most common ones:
Regardless, there are quick fixes to get your iPhone messages sending smoothly again. Keep reading to learn the potential fixes for this bug.
You need to connect to either cellular data or a Wi-Fi network to send a message on your iPhone. If your iPhone won't send text messages, you should first check your network connection.
Try to open a web page in Safari and see if there is a problem with the network you are using. You can turn off the Wi-Fi/cellular data and turn it back on, then try sending the message again.
Make sure that you're not in Airplane Mode, as this prevents your iPhone from sending and receiving cellular and Wi-Fi signals.
Open your iPhone's Control Center and disable the Airplane Mode. Or, you can turn it on and then off to force your iPhone reconnect to the network.

When you find that your iPhone failed to send messages, you should check your iPhone's Messages settings before you take other measures.
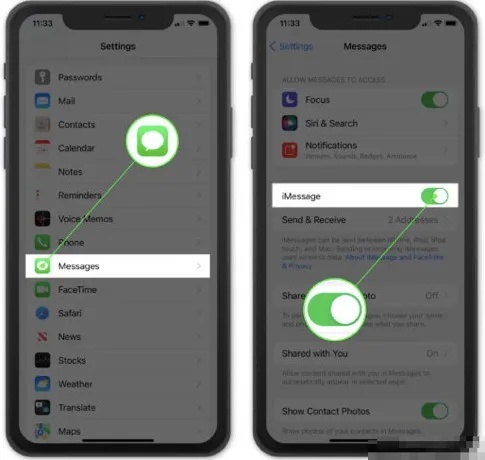
Go to Settings > Message and turn on "Send as SMS," "MMS Messaging," and even "Group Messaging" if you want to send group MMS messages.

 Note
NoteThe messages will be successfully sent if the date and time are set correctly on your iPhone. Click on the Settings option and go to General > Date & Time to enable "Set Automatically." If it is already on, try to turn it off and then back on again.
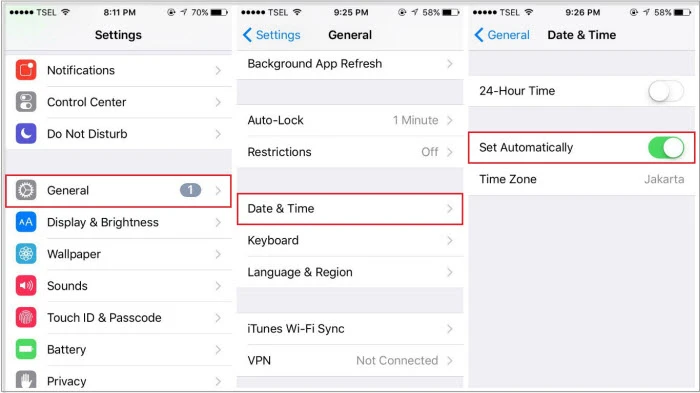
Any minor error in the recipient's number will cause the failure to send messages. Check the recipient's phone number and email address to make sure that you have sent it to the right and valid user.
If your iPhone is not sending or receiving messages, you can force quit the Messages app and then send text messages again.
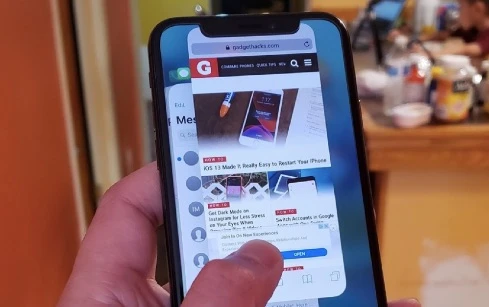
Also, you can delete the failed conversations in Messages. By doing this, you may free up the Messages app and let it work normally again.
If you use iMessage to send texts, make sure that iMessage is activated on your iPhone. It might have been accidentally turned off. To turn it back on, go to Settings > Messages and toggle the iMessage switch to On (green).
Restarting your iPhone can clear temporary memory and remove issues that affect the device to work normally.
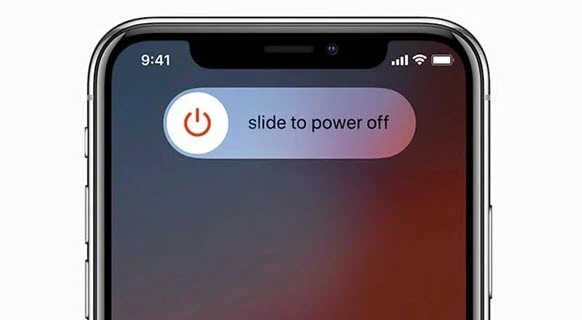
Drag the slide to turn off your iPhone. Wait 20-30 seconds and turn your iPhone back on, then your text messages will go through.
As a common method, resetting network settings can fix numerous bugs in iPhone, including the message send failure issue. Below, you'll find how to reset network settings.
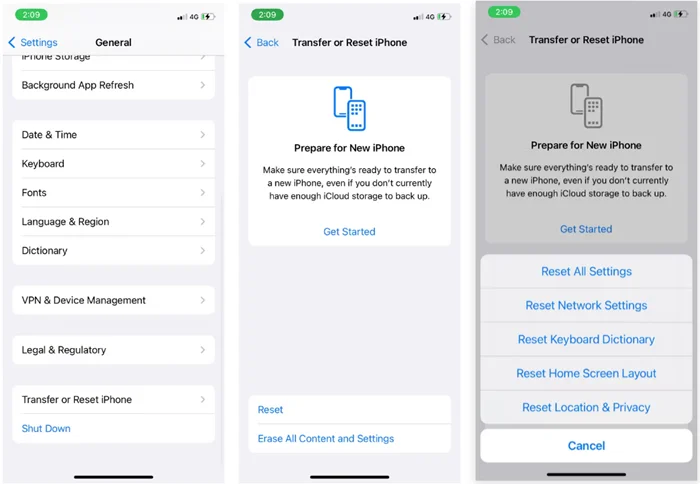
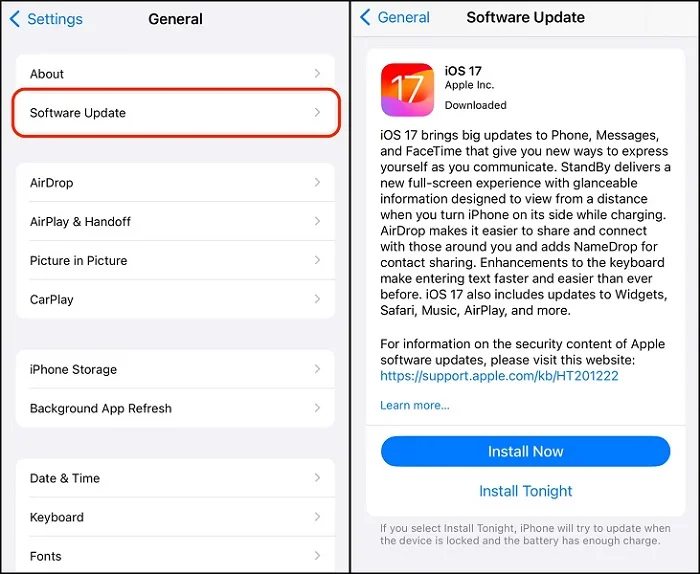
The latest version of iOS always contains bug fixes. If your iPhone still won't send text messages after trying the above methods, it is a good idea to update iOS.
To do the update, just go to Settings > General > Software Update > and click on "Install Now".
You will need to check the iOS system issue if the messages are still not sending. When it comes to fixing iOS system issues, FoneGeek iOS System Recovery is recommended.
This amazing tool has helped many Apple users repair various software issues, such as black screen of death, cellular data not working, iPhone keeps restarting, etc. What makes it acceptable is that the data will not be affected during the repair process.
Download the Windows or Mac version of this software and follow the steps below to fix the message issue.
Step 1. Launch the iOS System Recovery on your computer and click on "Standard Mode" from the main panel.

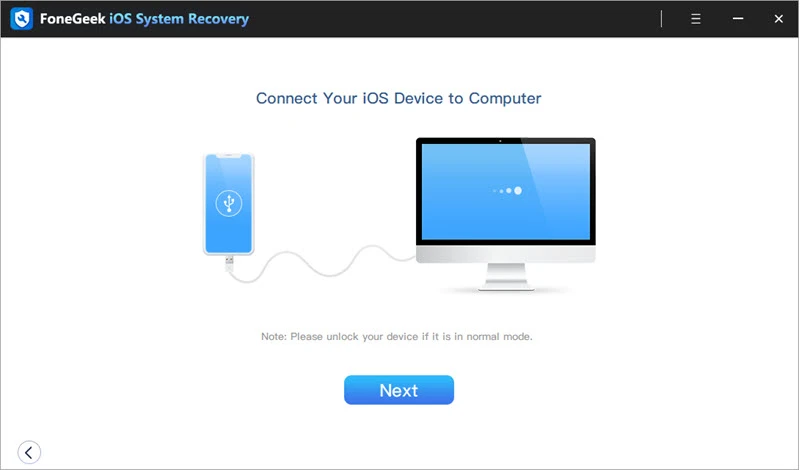
Step 2. Connect your iPhone to the computer and click on "Next," your iPhone will be detected automatically. If not, you need to follow the on-screen instructions to put it into DFU/Recovery mode.
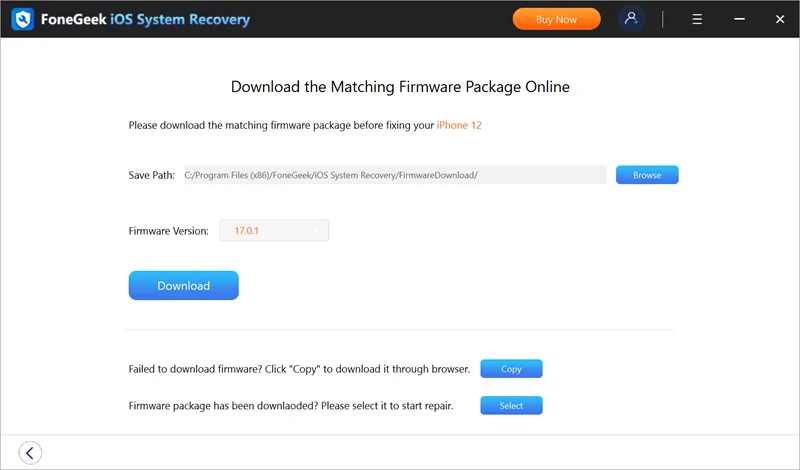
Step 3. Now check the device information and select your preferred firmware version, then click "Download" to start downloading the firmware package for the device.
Step 4. When the firmware is downloaded successfully, click on "Fix Now" to start the repair process.
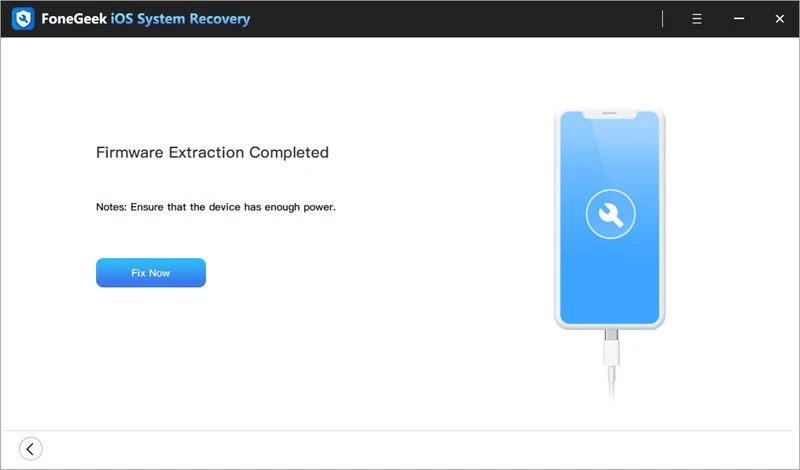
It will run for a while; after the process, your iPhone will restart, and you can check whether this problem has been fixed.
If the bug still exists even after trying all of the above steps, it's better to contact Apple to avoid worse results. Go to the local Apple Store to head your iPhone to an Apple expert for more technical support. Keep in mind to back up your iPhone in advance in case of any data loss.
Joan J. Mims is interested in researching all tips about iPhone, iPad and Android. He loves to share useful ideas with all users.
Your email address will not be published. Required fields are marked *

Copyright © 2025 FoneGeek Software Co., Ltd. All Rights Reserved