
 User Concern
“I keep getting this iPhone storage almost full error message after upgrading to iOS 18. I tried to clean up, restore and delete apps but its very frsutrating to has this pop up contantly on my phone and it dont let me use the phone and no app works at that moment.”
You may see the message "Storage Almost Full: you can manage your storage in Settings" pops up on your iPhone every now and then. One of the most annoying aspects of this particular message is that it can keep popping up, preventing you from using your iPhone when you need to.

This storage problem can be caused by too much data on your iPhone. All the apps, photos and videos on your device could be taking up too much space than the iPhone can give, causing this message to pop up. But keep in mind that this error is also happening to many users who still have a lot of free space on their iPhones.
If you're using your iPhone normally and get an error message that says your iPhone's storage is almost full, you've come to the right place. In this guide, we will provide you with 10 effective ways to fix it.
Usually, the data stored on your iPhone can take up a large amount of storage and you will be prompted to storage almost full error message. However, a lot users started seeing this "storage almost full" warning on their iPhone after iOS 18 update. And many of them still have plenty of free storage space on their devices. So, there is a great potential that this problem is an iOS 18 bug and it is best to wait for Apple to fix it in later iOS updates.
If you are experiencing this "storage almost full" problem, this first thing to do is to check your iPhone storage to see if it is actually full. To do this, open Settings > General > iPhone Storage, you will see how much storage is still available and what is currently using storage on your iPhone.
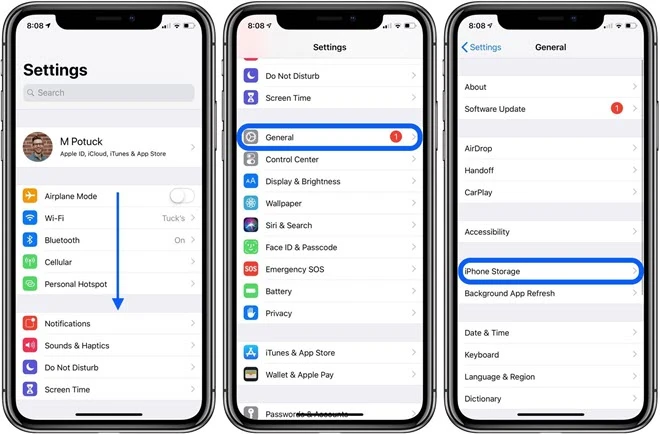
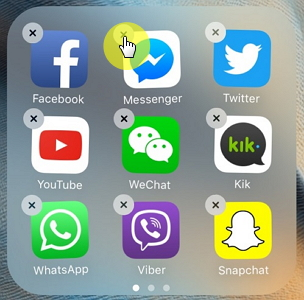
Another thing you can try when this storage almost full message pops up on your iPhone is to delete unused apps on the device.
Go through all the apps on iPhone Storage and delete the ones you don't need but take up much storage space.
Most people don't like to delete the photos and videos on their iOS devices. But usually they can take up a lot of space on the iPhone and removing them may create enough space to eliminate this error message. The following are just some ideas if you are not sure where to start:
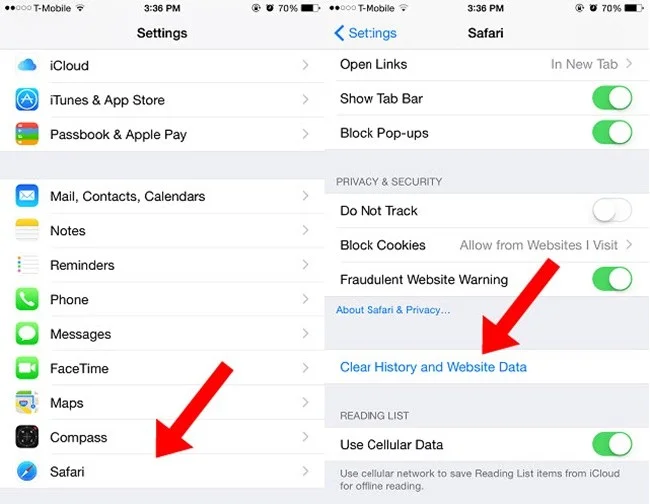
Safari is one of those apps that can store data (cache) for the purpose of cutting down the time it takes to access frequently visited sites. Cache can take up quite a bit of space on an iPhone when it accumulates over time and when deleted, you can be surprised by the amount of space you gain.
To clear Safari cache and history, go to Settings > Safari > Clear History and Website Data and then restart the iPhone.
Most of the apps on your iPhone tend to have large amounts of documents and data. These files can take up a lot of the space on the device and since most of them are junk files, they can easily be deleted.
The best way to remove the documents and data from your iPhone is to delete and re-install the app. Go to the App Store and uninstall the apps, and then reinstall them to create space on the device.
Photo Stream automatically syncs photos across iPhone and other iOS devices, which may quickly occupy a significant amount of storage. By turning off Photo Stream, you can delete these photos and free up the space. Here's how to do this:
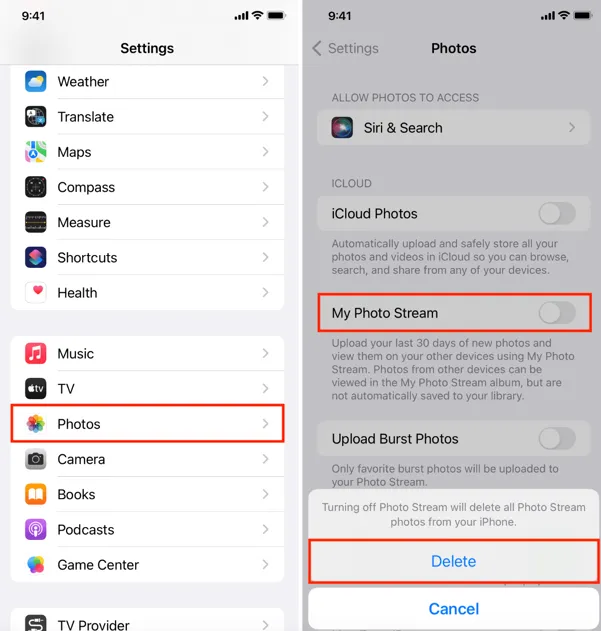
This will prevent Photo Stream from using up storage space on your iPhone by stopping photo syncing. You can easily re-enable syncing later if you choose to. However, keep in mind that any photos not manually saved will be deleted from your devices.
If your iPhone is already installed the latest iOS version, then you can try to restart the device. Maybe your iPhone is experiencing a small glitch. In this situation, restarting your iPhone might give the device a fresh start and fix the minor problem.
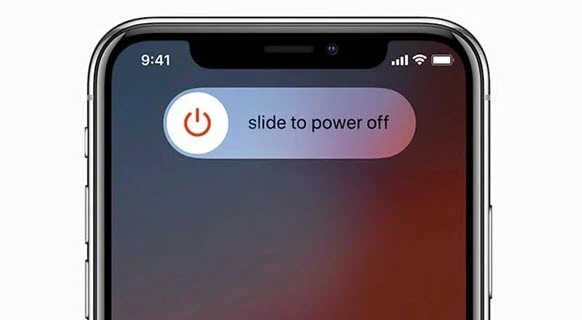
To restart an iPhone, press and hold the Side button and either Volume button (for old iPhones, just press and hold the power button) until "slide to power off" appears on the screen. Then swipe from left to right to turn off your iPhone.
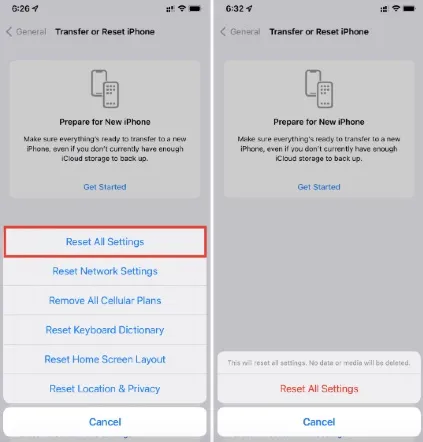
If your iPhone says storage is almost full but its not, you can try reset all settings to fix the problem. This will not erase the data on the device, however, it will affect the settings and preferences you've set up on your device.
To reset all settings on iPhone, go to Settings and choose General, then click on Transfer or Reset iPhone and select Reset All Settings.
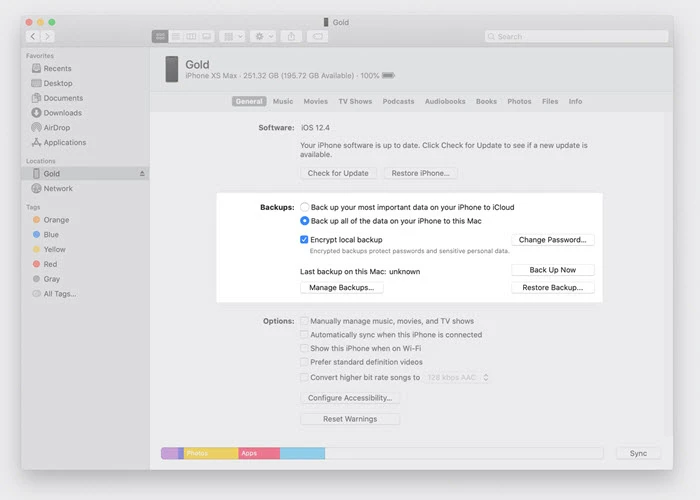
You can also fix this iPhone storage almost full error message by resetting the iPhone and restoring it from a backup either in iTunes or iCloud. It is important to note that resetting your iPhone will cause data loss, so you'd better make a full backup of your iPhone before doing this.
To back up your iPhone in iTunes, follow these simple steps:
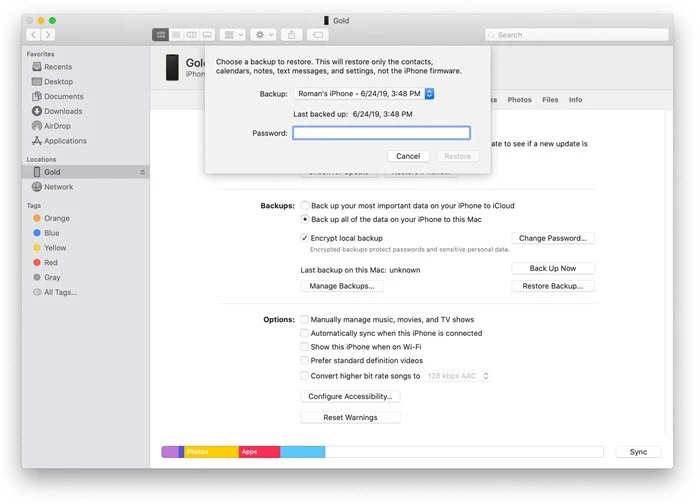
Once the backup is complete, you can restore the iPhone to fix this issue. Here's how to restore the device in iTunes:
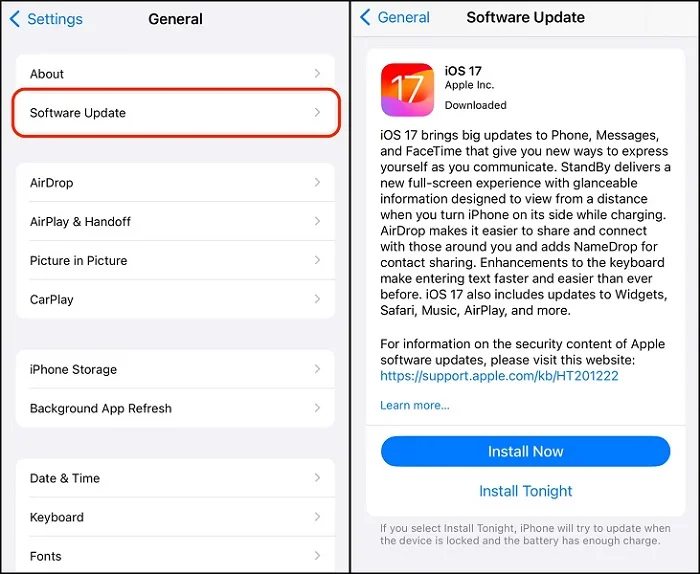
If you have plenty of available storage on your iPhone but still run into a problem like this, remember to check if a new iOS update is available and update to the newest version of iOS as soon as possible.
To check for iOS update, go to Settings > General > Software Update. If an update is available, tap Download and Install.
If all the solutions above fail to remove this error message, you may want to use FoneGeek Backup & Restore (iOS) to back up all the data on your iPhone to computer and then delete them. The following are some of the features that make it the most ideal solution:
To create a complete backup of all the data on your iPhone, follow these simple steps:
Step 1: Download, install the iPhone Data Backup & Restore tool on to your computer and then run it. From the options in the home screen, click on Backup & Restore to continue.
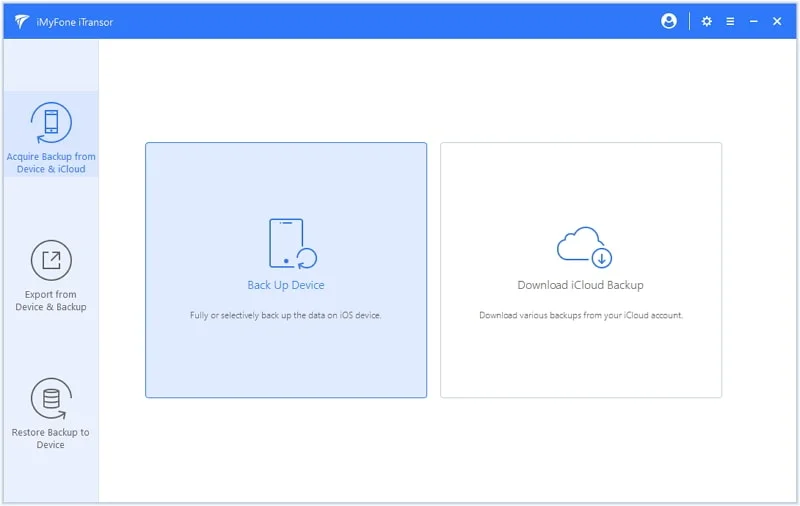
Step 2: Choose Backup and connect your problematic iPhone to the computer via an lightning cable, then wait for the program to detect the device automatically.
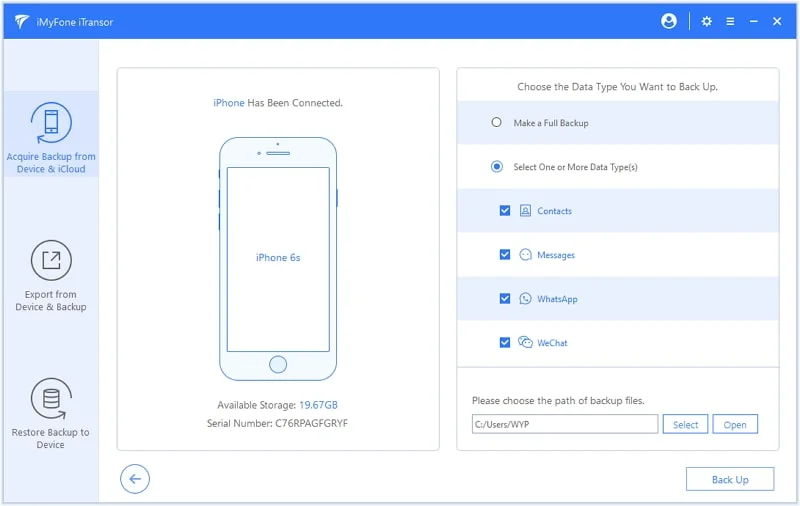
Step 3: Now you are able to select the types of data you would like to backup and then click Backup to begin. Ensure the device connected to the computer until the backup is done.
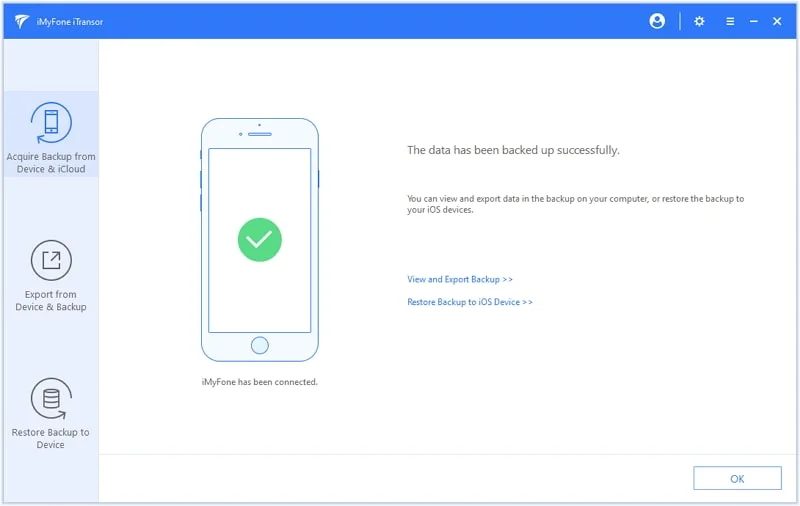
When the process is finished successfully, you can delete all the data on the iPhone and then restore only what you need back to the device and this error message will be gone.
If your iCloud backup is enabled and the iCloud storage is full, you might receive the "iPhone storage full" notification on your device, even if you've recently removed large files or your iPhone appears to be empty.
Apple suggests that you should have at least 50% of your storage available, or at least 3-4 GB of free space, before proceeding with a major iOS update, such as iOS 17. This extra space ensures there is ample room for temporary installation files and smooth update processing.
Fay J. Melton has explored the area of technology and software for more than 5 years and he is enthusiastic about helping users solve various technology issues.
Your email address will not be published. Required fields are marked *

Copyright © 2025 FoneGeek Software Co., Ltd. All Rights Reserved