
 User Concern
“My iPhone 16 screen is broken and I was not able to unlock it, I tried to enter the password, but with the broken screen it did not go well and then it went to 'iPhone is disabled' mode. What can I do to have my data back with my disabled iPhone?”
We've all done it: your iPone screen is broken or forgot the screen passcode, try to unlock the device by entering the password and unfortunately got a message saying that your iPhone has been disabled. You will not be able to use your iPhone, let alone access any of the data on it. So what can you do?
Worry not. In this article, we will show you how to deal with a disabled/locked iPhone, including the ways to re-enable your iPhone, recover data with/without backup, and unlock your disabled iPhone.
According to Apple Support, to enable the disabled iPhone, you will have to erase the device which deletes all your data and settings. Is it possible to recover data from disabled/locked iPhone? The answer is Yes. If you have backed up your iPhone with iTunes/iCloud before, you can easily retrieve your data by restoring the device.
If you haven't made any backup, you still have the possibility to recover data with third-party data recovery tool. But the premise is that you have synced the broken iPhone with your computer before and the device can still be recognized by the computer.
As we mentioned above, you have to erase your iPhone to re-enable it. This can be done in three ways:
Do you know that you get the possibility to back up and restore data with iTunes if you have synced the device with iTunes before? And you even don't need to unlock the disabled iPhone with a password. Your disabled iPhone will be detected automatically.
Step 1. Connect your broken or disabled iPhone to the computer that you've synced before and open iTunes. (If you are asked for passcode, you will have to use the recovery mode method.)
Step 2. The iPhone icon will appear when it is recognized. You should click the icon and select "Back Up Now" to back up the iPhone. The iPhone backup archive will be saved on your computer.
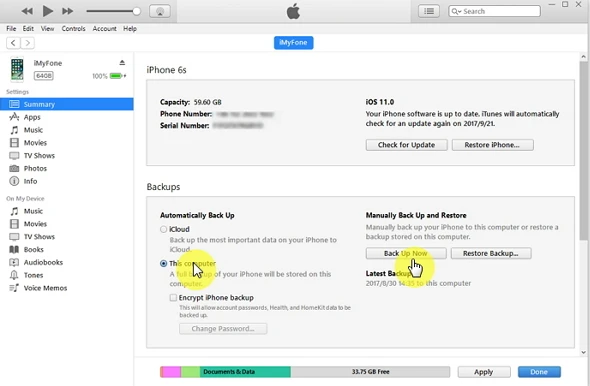
Step 3. It won't take long time for the backup process to complete. After the backup is finished, click "Restore iPhone" and restore your iPhone with the latest iTunes backup.
Most users complained that the device was not backed up with iTunes in advance so the device cannot be recognized. Don't worry, you can still restore your iPhone by putting the device into recovery mode. Check the steep below:
Step 1. The 1st steps is still connect the broken or disabled iPhone to the computer and open iTunes.
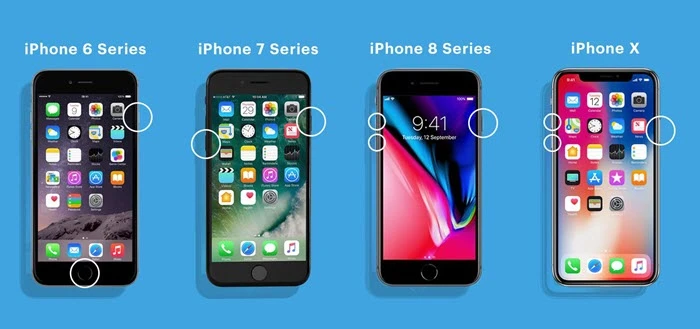
Step 2. Then force restart your iPhone and put it into recovery mode. Follow this page if you don't know how do that.
Step 3. iTunes will detect the iPhone in recovery mode and you will receive a pop up message. Click "Restore" and iTunes will download software for your iPhone.
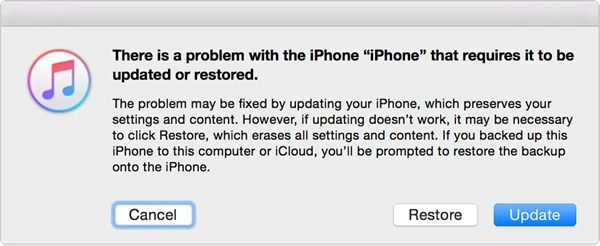
Step 4. After the restore completes, you can set up your iPhone and the device will be reset to its default settings after that.
If you have set up Find My iPhone in iCloud before, you can also use this feature to re-enable your disabled/locked iPhone. Here's how to do it:
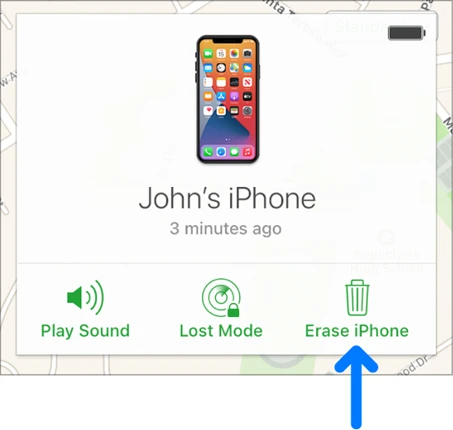
This will erase the device and delete all your data. If you've backed up you data in iCloud or iTunes, you can choose to restore the device from the backup.
Fret not if you haven't had any backup before, FoneGeek iPhone Data Recovery will help you a lot. However, you need to ensure that the software is downloaded on a computer that has recognized your iPhone before it is disabled. It is 100% secure to get data from broken iPhone without backup with the recovery tool. Why is this program highly recommended? Check the reasons below:
Now take a look at the steps below to recover data from disabled iPhone without backup using Fonegeek iPhone Data Recovery.
Step 1. Download and install the recovery program on the computer that can automatically detect your iPhone even if it is disabled or locked. Launch it and you can see 3 recovery modes on this interface. Choose the recovery mode of "Recover Data from iOS Devices" and connect your disabled iPhone to your computer.
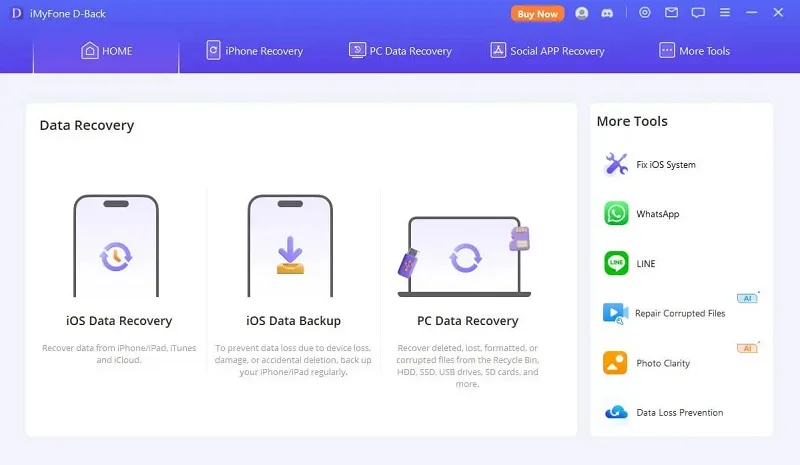
Step 2. To shorten the recovery time, you can choose the data you need to recover and click "Scan" to continue.
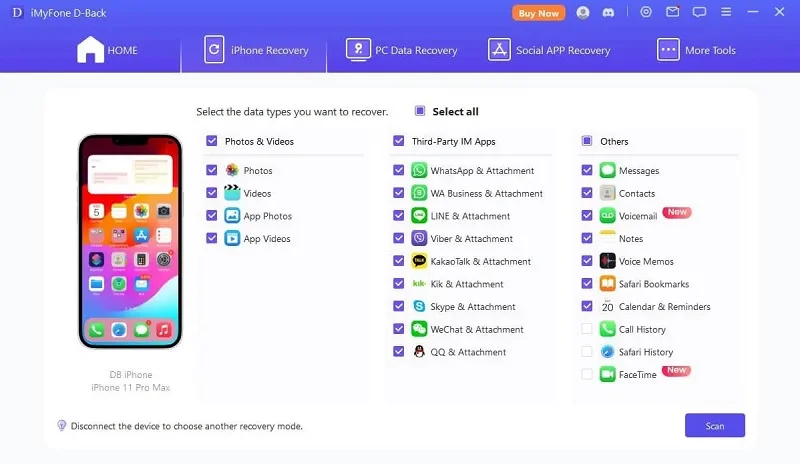
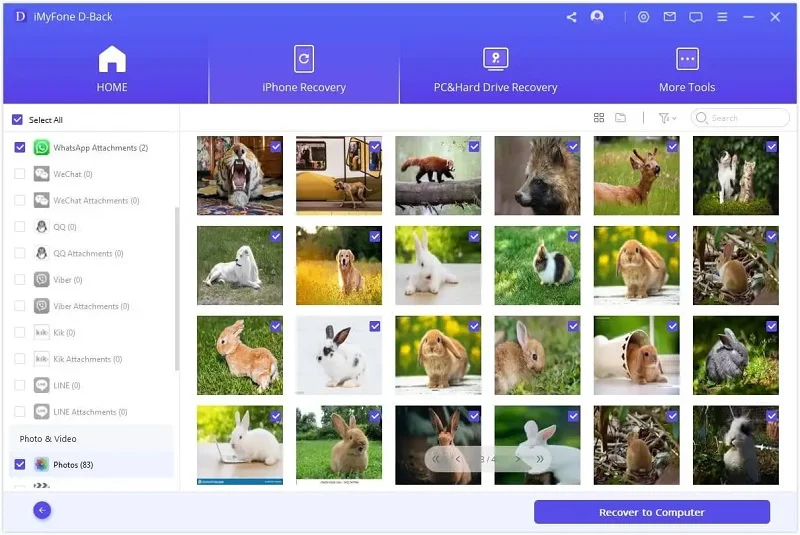
Step 3. After the program scans the data you selected, you will be able to preview the selected data in detail. To save the data, click "Recover to PC" button and export the selected data from disabled iPhone to your computer.
With FoneGeek iPhone Data Recovery, you can also recover data from iTunes and iCloud backup selectively without restoring the device.
Step 1. Click "Recover Data from iTunes Backup" on the main interface and choose an iTunes backup.
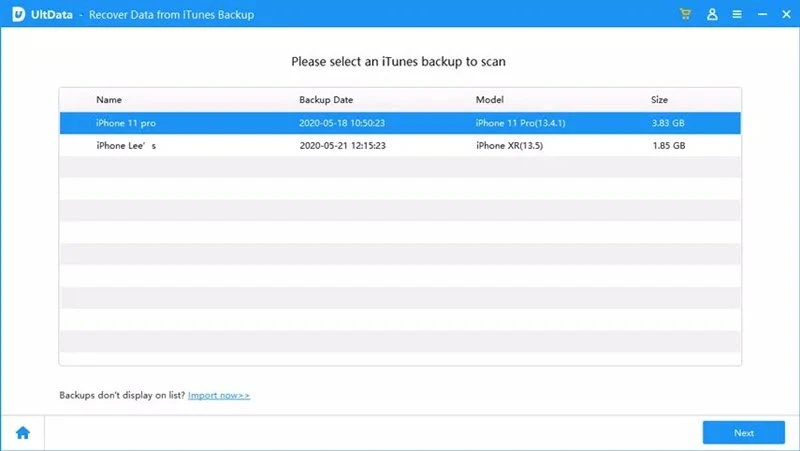
Step 2. Preview the iTunes backup data, choose what you want and click "Recover" to save the data to pc.

Step 1.Click the recovery mode of "Recover Data from iCloud". Enter your iCloud account information to sign into the iCloud.
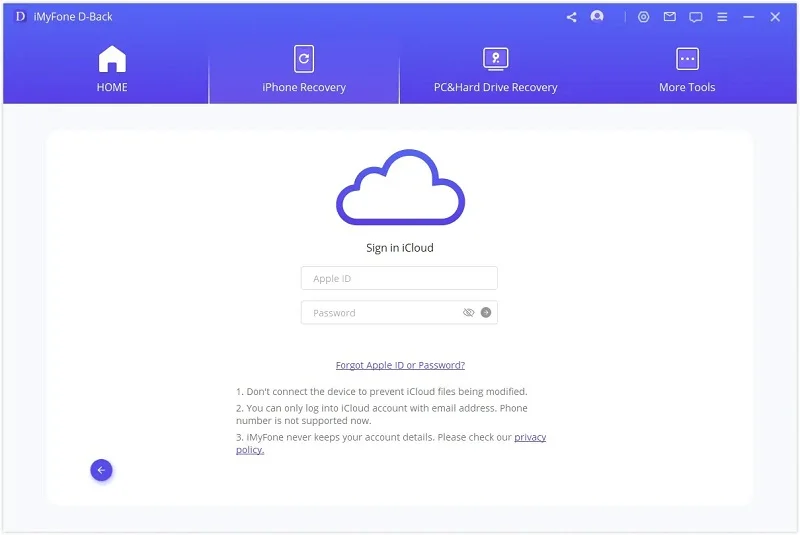
Step 2. Select the data types you want to recover and click on "Download" to begin downloading data from iCloud backup.
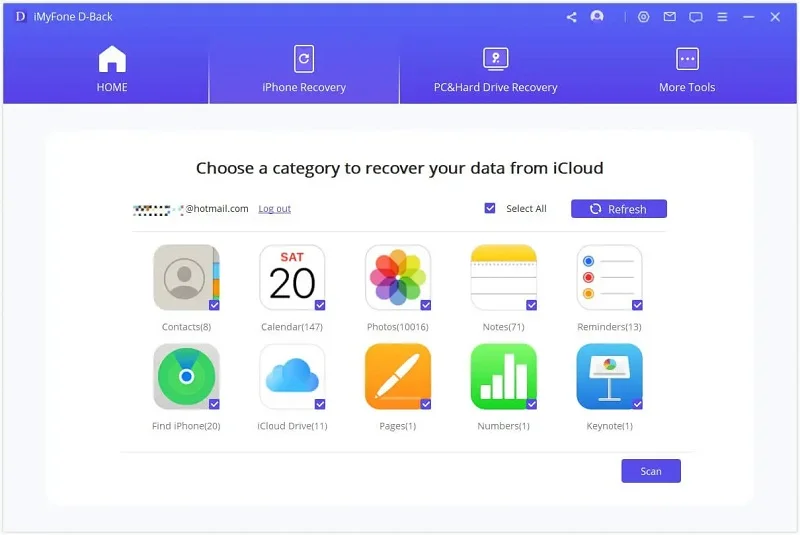
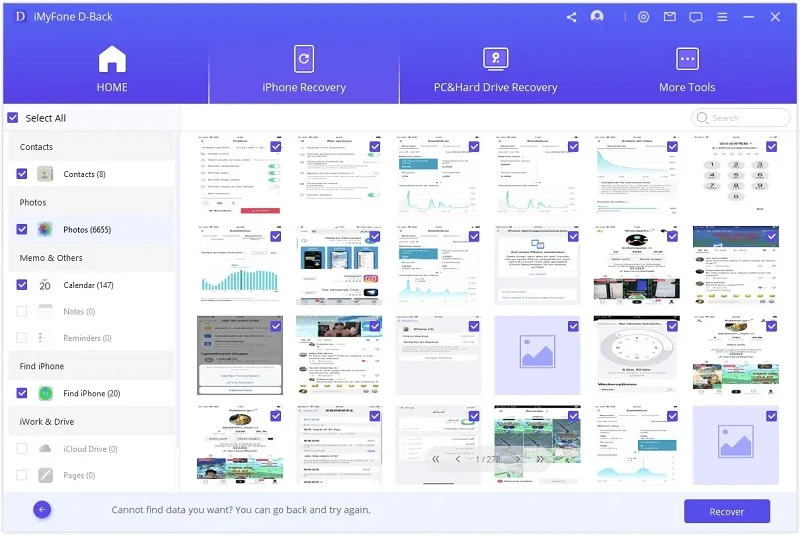
Step 3. After that, you can preview the data in details and choose the files you need, then click "Recover to PC" to retrieve them back.
If you forgot the screen passcode and enter the wrong passcode for several times, iPhone will be disabled and locked. The most traditional way to remove screen passcode is to restore iPhone with iTunes/iCloud. But it is not recommended if you are worried that your iPhone data will get erased. Things will become different with the help of FoneGeek iPhone Passcode Unlocker.
FoneGeek iPhone Passcode Unlocker is a powerful screen unlock program that enables you to unlock your disabled iPhone with any 4-digital/6-digital passcode without restoring the system.
Here are the steps to unlock disabled iPhone without data loss using FoneGeek iPhone Passcode Unlocker.
Step 1. Launch the unlocking tool and select the "Unlock Screen Passcode" mode to continue.
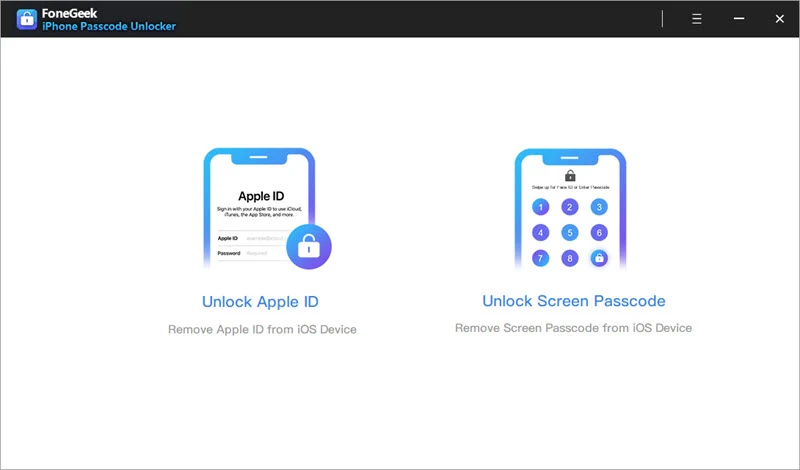
Step 2. Put iPhone in DFU mode by following the instructions and click "Download" to download the matching firmware.
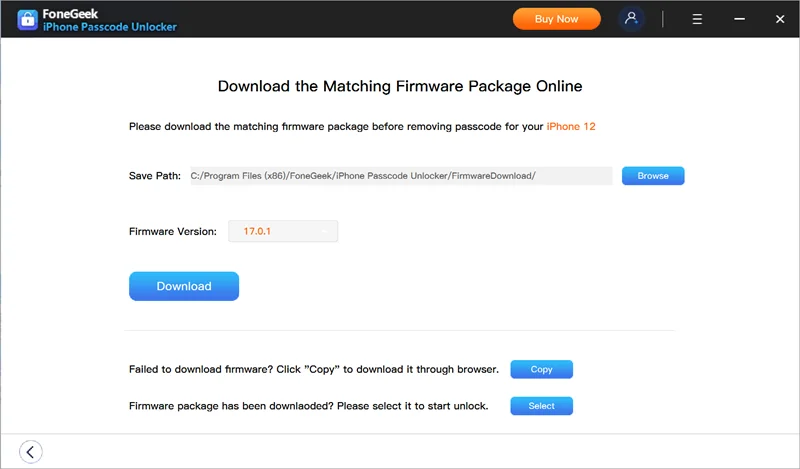
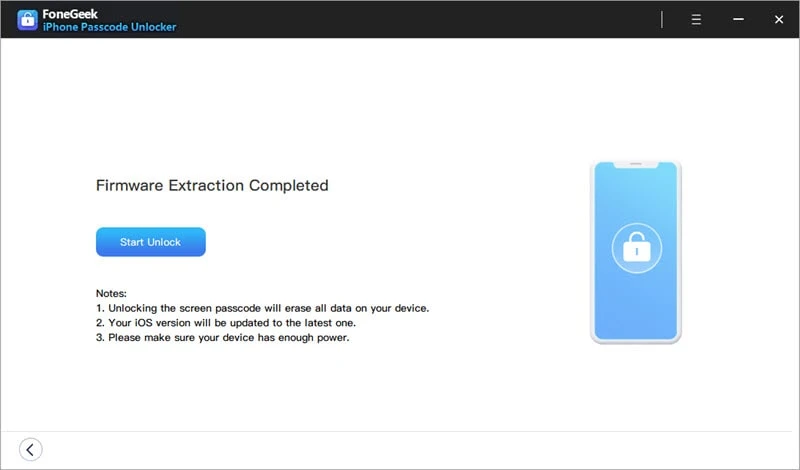
Step 4. Click "Start Unlock" and the program will unlock the device in one click.
As you can see the solutions mentioned above, you are able to recover data from disabled iPhone with or without restoring your iPhone. It is still highly recommended to give FoneGeek iPhone Data Recovery a chance to directly recover data from iPhone/iPad without backup.
Joan J. Mims is interested in researching all tips about iPhone, iPad and Android. He loves to share useful ideas with all users.
Your email address will not be published. Required fields are marked *

Copyright © 2025 FoneGeek Software Co., Ltd. All Rights Reserved