
 User Concern
“Hey i just broke my screen and I'm expecting a new phone, but i don’t want to lose all the stuff I had on my last iPhone X. i tried to back up the phone but iTunes wont recognize my phone before i enter the password on my phone. The problem is I cant navigate through my phone because the screen is broken. HELP!!!”
No one wants an iPhone with a broken or unresponsive screen. But sometimes it can happen and this doesn’t mean that you will lose access to all the data on the device. Broken screens can be repaired or replaced, but it is important to safeguard the data on the device before taking it to repair.
There are many options to back up your iPhone, but very few will work if the screen is broken. The following are the top four solutions to back up an iPhone with a broken screen.
To back up your iPhone, you need to connect it to a computer. Once connected, a verification prompt will appear on the device, asking you to confirm the connection with the computer.
There are two scenarios that can occur when the prompt appears:
If you’ve connected your iPhone to this computer before and trusted it, the connection will be established automatically. No further confirmation is required.
If you’ve never connected your iPhone to the computer before, manual verification will be required. You need to tap the appropriate button on the confirmation prompt to allow the connection between iPhone and computer.
This process can be a bit tricky, but we’ve figured out a way to back up your data even if you’ve never connected your iPhone to this computer before.
Have you ever connected your iPhone to a computer and click “Trust” option when the system prompted you to trust the computer before the screen is broken? If the answer is YES, then you are really a lucky dog.
Your computer and iTunes will automatically detect your broken iPhone when the device is connected, you don’t even need to click ‘Trust’ on the device screen. So that you can easily backup iPhone with broken screen via iTunes. You can follow the steps below:
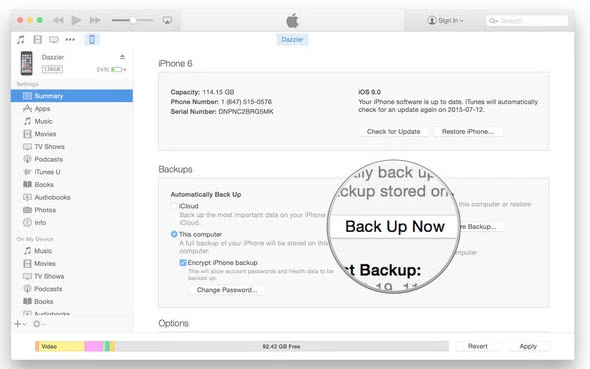
The iTunes method will not be ideal for you if you have never trusted your iPhone with a computer before the screen is broken, since iTunes will require you to trust this computer on the broken screen, which is nearly impossible to be done. Worry not, we have also provided relevant solutions for this situation, keep reading.
FoneGeek iOS Backup & Restore is a data managing tool for iPhone users to backup and restore the device data. Using it, you can easily make a full or partial backup of your iPhone data, then restore the backup to any device selectively without causing data loss. Besides, it can export data from iTunes and iCloud backup, which is helpful when your iPhone is totally damaged and you have no access to the device any longer. It works well with almost all iOS versions and iOS devices, even the newest iOS 16 and iPhone 14.
Now download the FoneGeek iOS Backup & Restore to your computer and backup your iPhone data to computer:
Step 1. Run this program on your computer and connect your iPhone using an USB cable. The device will be automatically detected.
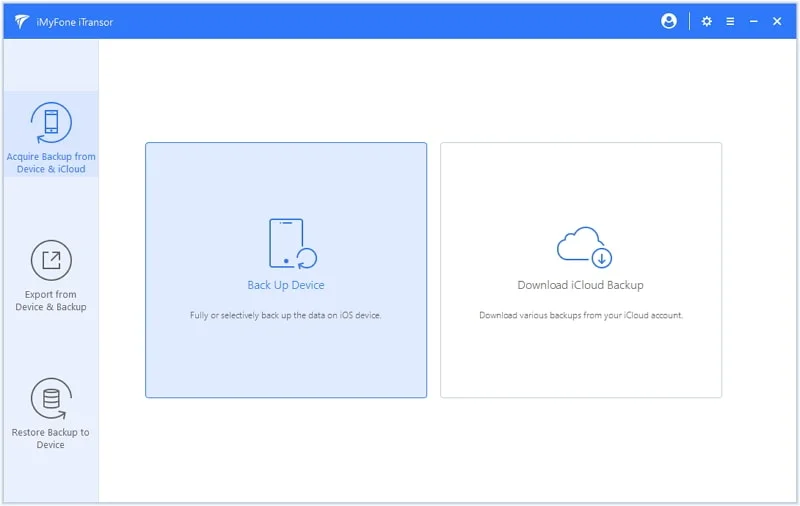
Step 2. Select “Backup & Restore” tap from the menu and choose the data you need to back up in the next window.
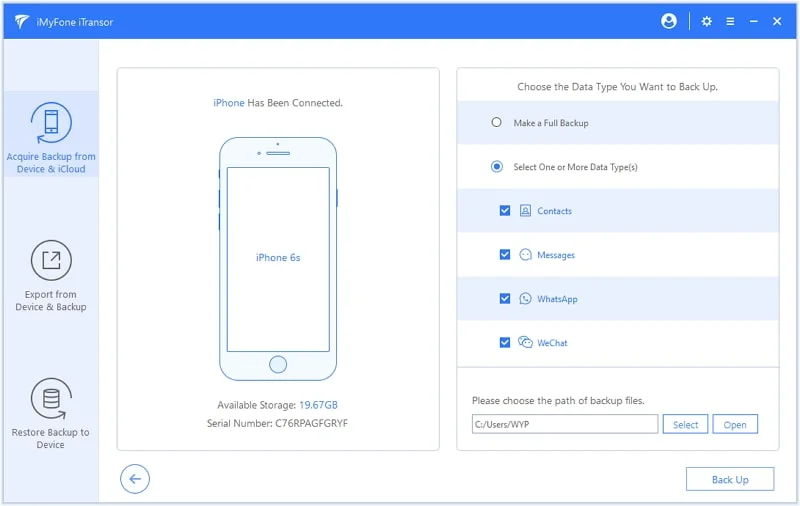
Step 3: Click on “Backup” and the backup will get started immediately. The complete backup process depends on the data size of the data you selected.
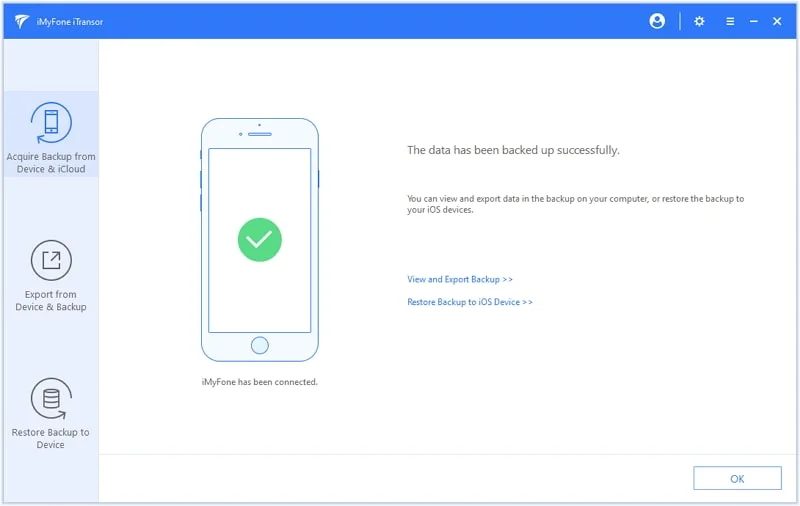
After the backup is finished, you can click on “View Backup Data” to view each data you backed up with this program in detail. Also, you can choose to export these data to your computer for print or restore to a different device.
You can back up your iPhone data even if you can’t access the screen using the VoiceOver feature and a USB keyboard. But for this method to be working, you need to have enabled Siri as well as Touch/Face ID on the device. You will also need to use a lightning-to-USB adapter for the keyboard.
Once you have everything ready, follow these simple steps to backup iPhone to iCloud:
Step 1: Start by unlocking your broken iPhone using Face ID or Touch ID and ask Siri to turn on the VoiceOver feature. Then using the lighting-to-USB adapter to connect the keyboard and the iPhone.
Step 2: Tell Siri to open iCloud Settings and use the right cursor key on the keyboard to scroll through the list of apps that you can see on the iPhone.
Step 3: When you get to the “iCloud Backup” option, press the “Ctrl + Alt + Space” keys on the keyboard or the “Ctrl + Option + Space” keys if you are using a Magic Keyboard to select it.
Step 4: Press the right cursor key three times to check if the iCloud Backup has been enabled. If it is not, VoiceOver will say “iCloud Backup Off”; in this case, you have to repeat step 3.
Step 5: Once you are certain that the backup option has been enabled, press the right cursor key twice and then press “Ctrl + Alt + Space” or “Ctrl + Option + Space” to select the “Back Up Now” again.
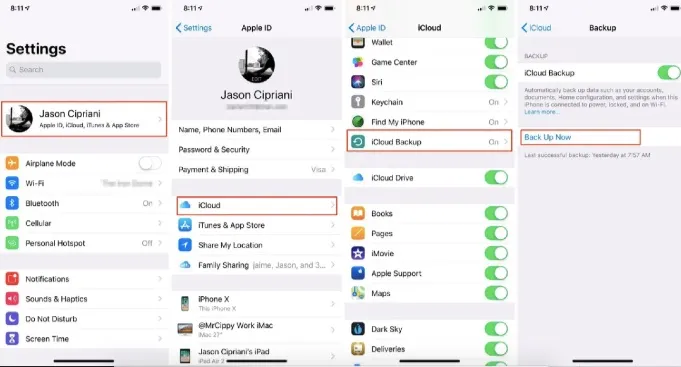
The iCloud backup process will begin immediately. You should see a progress bar on the screen along with the estimated time remaining for the backup is complete.
If you’re switching your iPhone rather than repairing the screen, you can also back up the data on the broken device by moving the data to a new iPhone.
Follow these simple steps to move data on the broken iPhone to a new iPhone:
Step 1: Enabled VoiceOver on the broken iPhone and connect the keyboard to the device.
Step 2: Set up the new iPhone and in the “Quick Start” menu, choose “Transfer directly so this iPhone will be ready with your data when you finish setting up”.
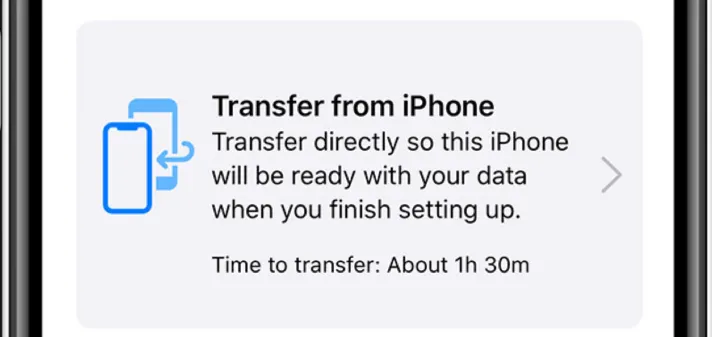
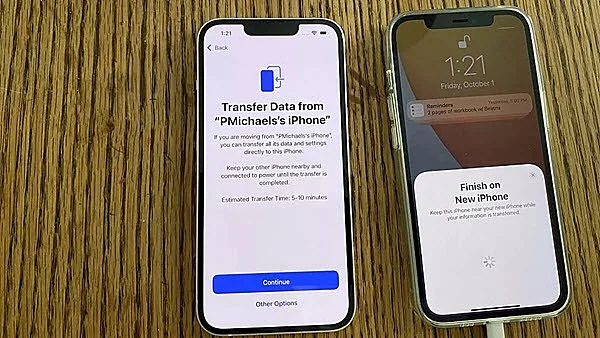
Step 3: Keep both devices close to one another and the message “Unlock to Continue” will popup on the broken iPhone. Use the right arrow keys on the keyboard to select “Continue” and VoiceOver will let you know when it has been successfully selected. Use the “Ctrl + Alt + Space” keys on the keyboard to confirm the selection.
Step 4: Your Apple ID will pop up. Use the left or right arrow keys to select “Continue” and once again listen to the VoiceOver for confirmation.
Step 5: You will then be prompted to use the old phone to scan the pattern that appears on the new iPhone’s screen.
Step 6: When the code has been scanned successfully, you can then continue with the “Quick Start” menu on the new iPhone. On the “Transfer Your Data” screen, choose “Transfer from iPhone” and the data transfer will begin immediately.
Backing up the data on an iPhone with broken screen doesn’t have to be difficult. The process can be further simplified using tools like FoneGeek iOS Backup & Restore. For further assistance learning how to backup an iPhone with a broken screen or any other iPhone-related issue, keep reading our blogs.
Fay J. Melton has explored the area of technology and software for more than 5 years and he is enthusiastic about helping users solve various technology issues.
Your email address will not be published. Required fields are marked *

Copyright © 2025 FoneGeek Software Co., Ltd. All Rights Reserved