
If you have regularly synced your iPhone or iPad on a Mac computer, you should know that the new macOS Catalina will prove confusing for most iOS users. This is because iTunes will no longer be available on your Mac once you update to Catalina 10.15. Instead users need rely on Finder to back up and restore their iPhone/iPad.
If you are wondering how that can be possible, you are not alone. To answer numerous questions on this issue from our users, we've finally decided to address the process of backing up and restoring an iPhone with Finder in macOS Catalina. Also, we'd like to show an alternative way to backup & restore iPhne without using Finder.
To back up your iPhone on Mac running macOS Catalina 10.15, follow these simple steps:
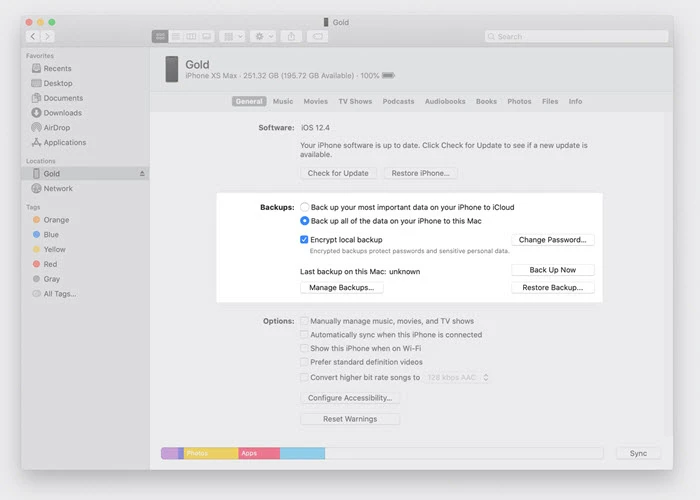
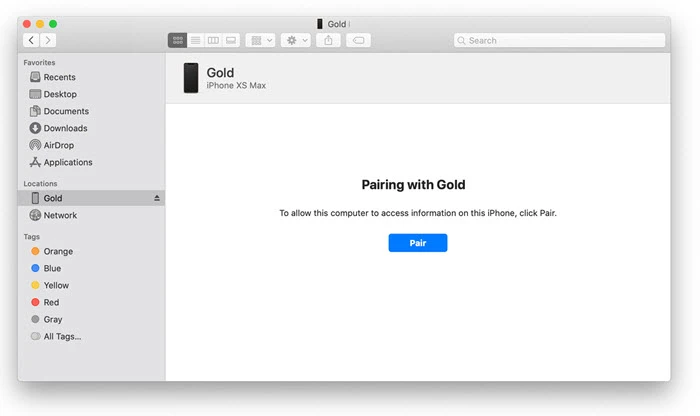
Note: If you are plugging your iPhone or iPad to the Mac computer for the first time, you will be asked to pair the two device. Click on "Pair" in Finder and tap "Trust This Computer" on your device.
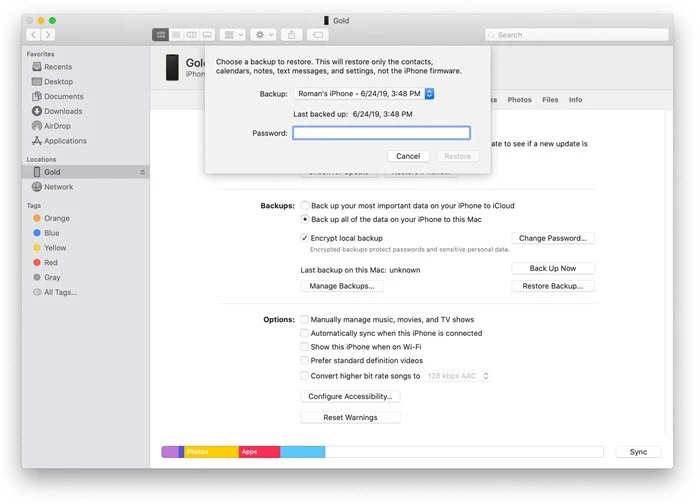
If you would like to restore the backup back on to your iPhone, follow these simple steps:
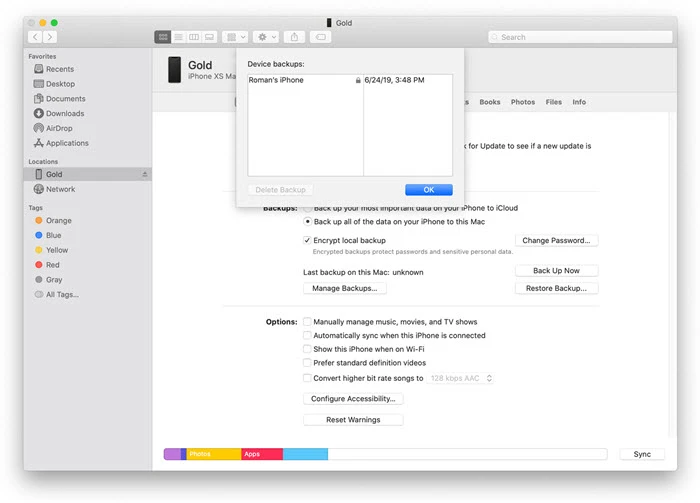
When you backup your iPhone or iPad on the Mac using the process described above, the old backups are not removed. Actually, the process creates a new backup file every time. Although this may come in handy when you need to restore the device from a different point, multiple backups can take up large space on your Mac. Follow these simple steps if you would like to delete some of them:
If you would rather not use Finder to back up and restore the device or you would like an easier and more secure way to do the task, here we recommend using FoneGeek iOS Data Backup & Restore. This tool makes it very easy for iOS device users to backup and restore the data on their devices in a single click. Some of the program's features include the following:
Here's how to backup iPhone or iPad without Finder on macOS Catalina:
Step 1: Download and install the iPhone Backup & Restore tool on to your computer, then launch it and connect your iPhone to the computer. From the options in the home interface, select "Backup & Restore" to begin.
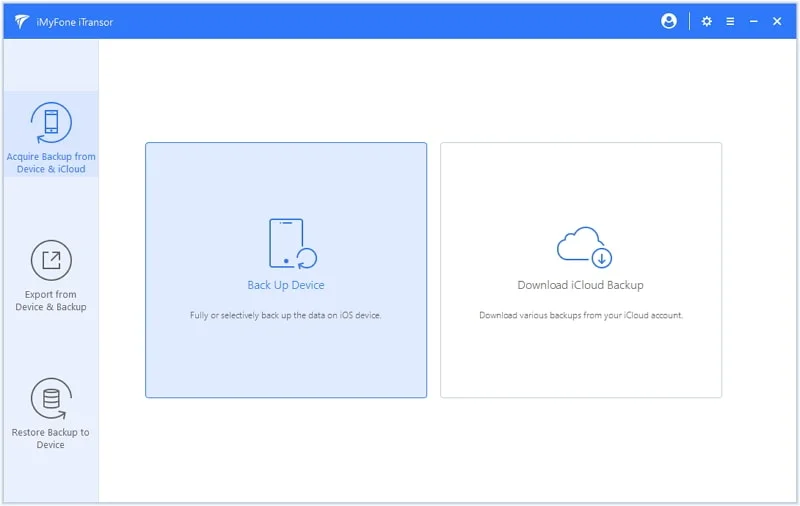
Step 2: Now select the types of file you wish to backup and then click "Backup" to begin the backup process.
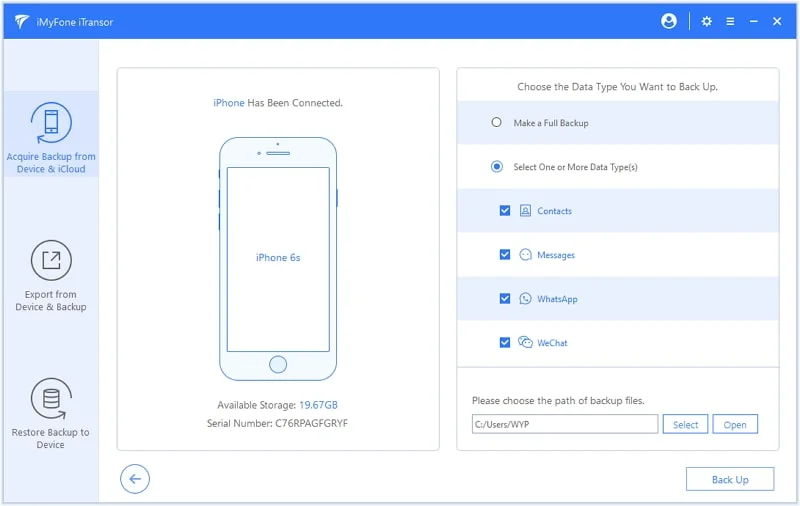
Step 3: Ensure your device is connected to the computer until the backup is complete. Once completed, you can choose to view backup data.
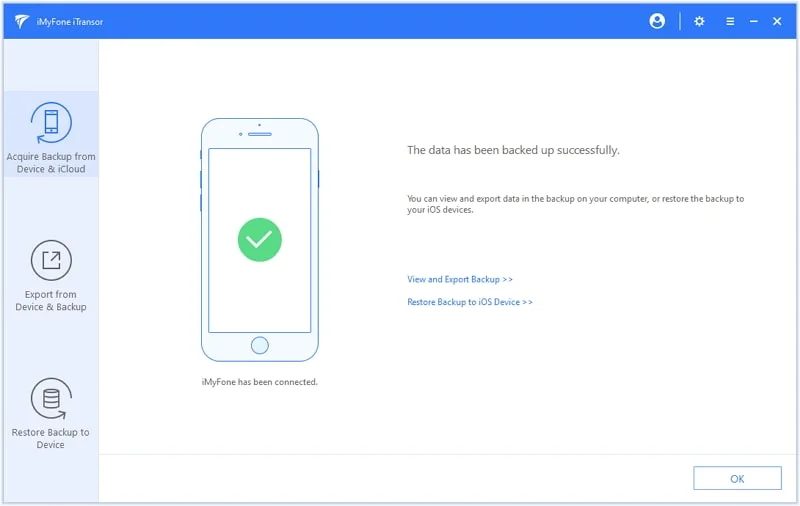
Here's how to restore data from backup to iOS device without Finder:
Step 1: In the program's main window, select "Backup and Restore". Connect your device to the computer and then choose "To view or restore previous backup files" from the lower left corner.
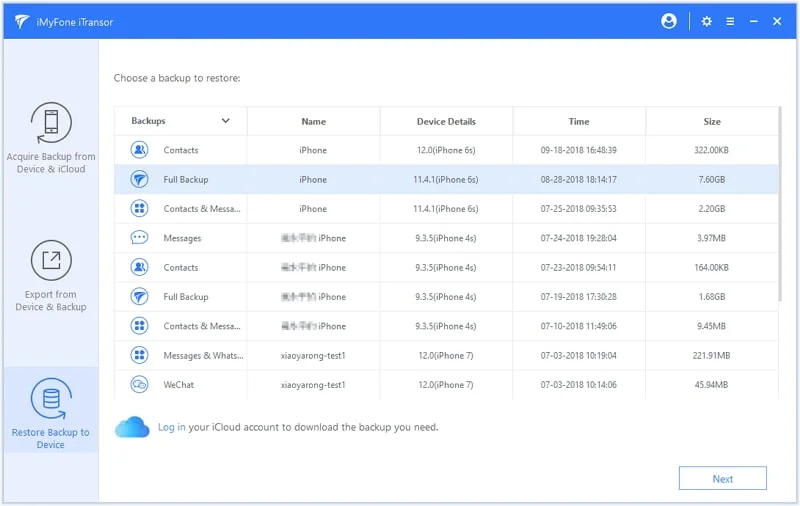
Step 2: If you want to restore the backups created using this tool in the past, select the backup file and click on "View" to proceed.
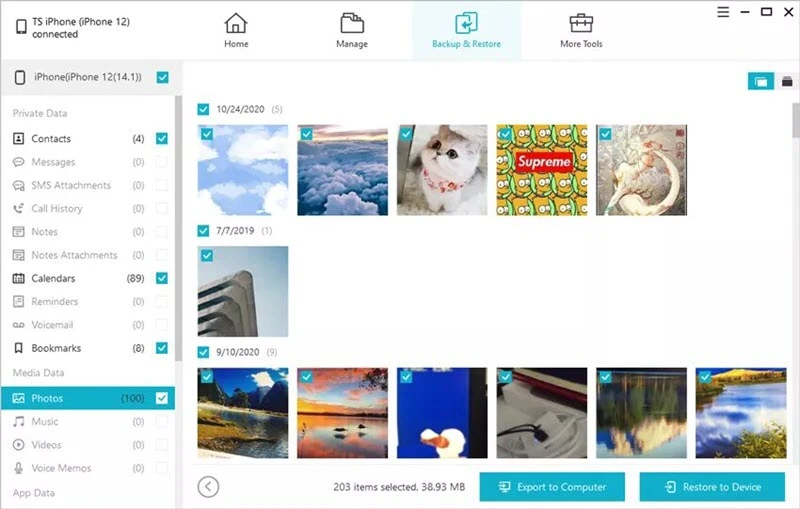
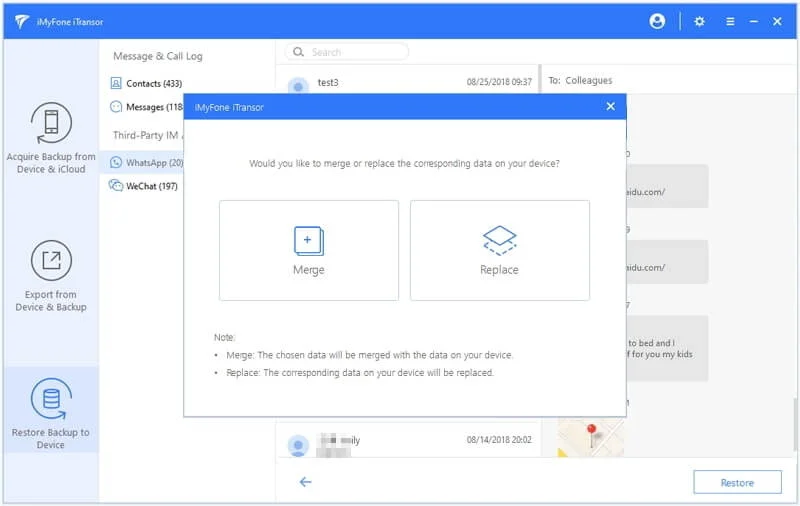
Step 3: Simply select the files you would like to restore and then click "Restore to Device". In a few seconds all the selected data will be restored back on to the device.
There is officially a new way to backup and restore your iPhone on Mac and as you can see from the steps above, the process is quite easy. But a third-party tool like FoneGeek iOS Data Backup & Restore will do things no other backup and restore solution can do; it will allow you to selectively restore data back on to the device. Try it today and share your thoughts on it or any other iOS data issue with us in the comments section below and we'll do our best to find solutions.
Joan J. Mims is interested in researching all tips about iPhone, iPad and Android. He loves to share useful ideas with all users.
Your email address will not be published. Required fields are marked *

Copyright © 2025 FoneGeek Software Co., Ltd. All Rights Reserved