
If you are a lover of Pokémon Go, you should understand that catching the ultra-rare Pokémon is the surest way to advance in the game. However, they are located in hard-to-reach areas, which makes it tough to get them. Therefore, you need to improve your chances of catching them, and Pokémon go snipers are helpful.

Pokesniper is a popular and reliable Pokémon go sniper choice, so if you don’t want to spend hours trying to hunt Pokémon in those almost inaccessible places, you need it. This post will teach you how to use PokeSniper on both Android and iOS device. Also, you will find a better alternative to PokeSniper to catch rare Pokémon without getting banned.
Pokesniper is one of the most popular and powerful apps for Pokémon snipping, designed to help you capture all those ultra-rare Pokémon easily. It has coordinates that will help you discover the exact position of Pokémon without moving around the streets, which saves you a lot of time.

With this app, you can find the precise coordinates of the Pokémon in your area, teleport from one location to another with just a click to capture ultra-rare Pokémon.
It is popular among Pokémon Go lovers because it is easy to use and provides many ways of capturing your most wanted Pokémon. Pokesniper is also safe as it decreases the risk of users being soft-banned. Its user-friendly interface is also a huge plus.
PokeSniper is available on both Android and iOS devices. Here is the step-by-step guide to download and install PokeSniper on your device.

Step 1: Pokesniper is no longer available on the Google Play Store, so you have to download the APK file from third-party sources like GitHub directory.
Step 2: On your Android device, go to Settings > Security and enable the “Unknown Sources” option to allow your device installing a third-party file.
Step 3: Now open the downloaded APK file and a pop-up with the options “Cancel,” “Market,” “Install” will be displayed. Click on the install button to start the installation process.
Step 1: PokeSniper is available on the Apple Store, however, your iOS must be 8.0 or above to download it on your iPhone. Launch the Apple Store and search for the app.
Step 2: Click on the “Get” button, and Pokesniper will be installed on your iPhone.
Once PokeSniper has been successfully installed on your Android or iPhone, you can open the app and use it to locate any rare Pokémon in the Pokémon Go game.
It is necessary to set up and configure the PokeSniper app before you can use it. You will also be required to have a working Pokémon ID.
Step 1: Open the app and click “OK” to accept the Apk agreement. Then select “Accounts” in the menu.
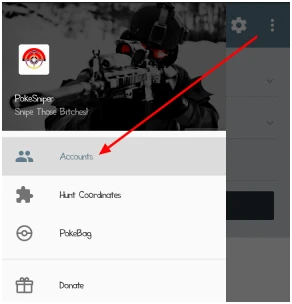
Step 2: Click the “Add Account” button in the Accounts section. Enter your Pokémon Go/Pokémon Trainer Club account details, and turn on the Google account button.
Step 3: Set home coordinates which is the last location you used Pokémon Go. It is crucial, and it has to be the correct latitude and longitude coordinates to avoid a soft ban.
Step 4: Once you’ve filled all required information, click on the “Save” button to save the settings. Your account will now be visible under the Accounts section.
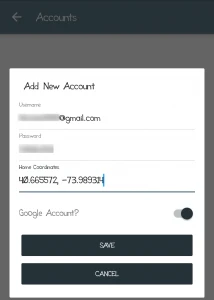
You can click click the “Back” icon to return to the main screen. Now you are ready to snipe Pokémon using PokeSniper.
Step 1: Open the PokeSniper app and tap the menu on the top-left corner, then select the “Hunt Coordinates” option.
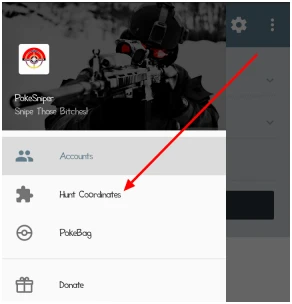
Step 2: The following options are under the “Hunt Coordinates” section: Rarespawns, Pokesnipers, PokeZZ.
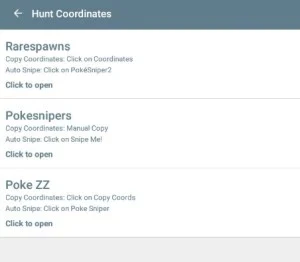
These can be used to get the coordinates of the Pokémon you are interested in capturing. Selecting any of the options above that loads the official PokeSniper’s website.
Step 3: After the website loads, scroll through the list to find your desired Pokémon and its details. There’s a filter function available on the website to help with your search.
Step 4: You will be redirected to the app, and the details of the selected Pokémon will be automatically filled in. Click the “SNIPE THOSE BITCHES” button to begin snipping.
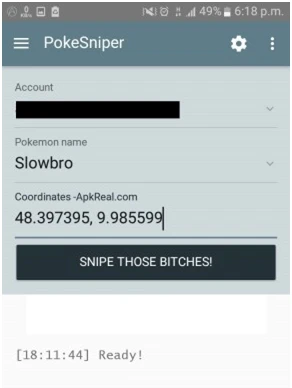
If the message “Pokémon captured” appears in the log box, congratulation! Your targeted Pokémon was successfully sniped by PokeSniper.
There could be some drawbacks of Pokesniper that may make sniping a little bit difficult for you. One major issue is that you cannot change your coordinates inside the app, making it hard to hunt Pokémon not in your area. Therefore, you will need a tool to change coordinates and find your Pokémon in other areas.
FoneGeek iOS Location Changer is a Pokesniper alternative that allows you to freely change your GPS location to hunt your ultra-rare Pokémon without moving. You can also alter your moving speed as desired. Let us see more features of FoneGeek iOS Location Changer.
Step 1: Doownload and install FoneGeek iOS Location Changer on your computer and the default mode is “Get Started”.
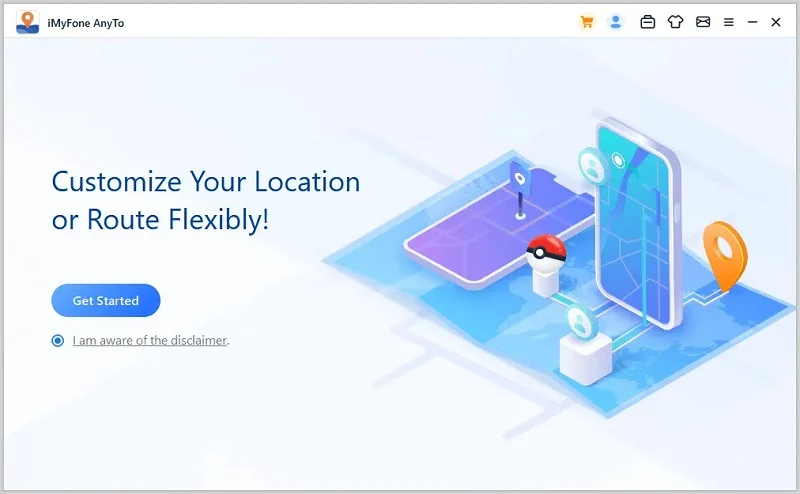
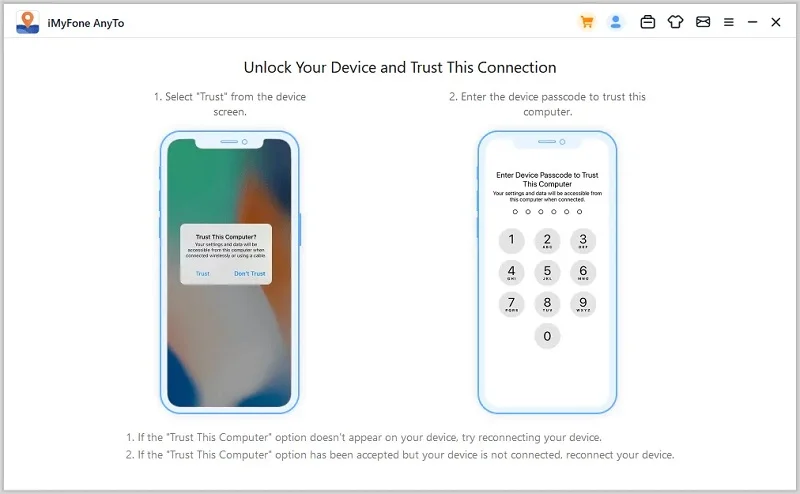
Step 2: Connect your IPhone to your computer with a USB cable. Unlock the device and click “Enter” to proceed.
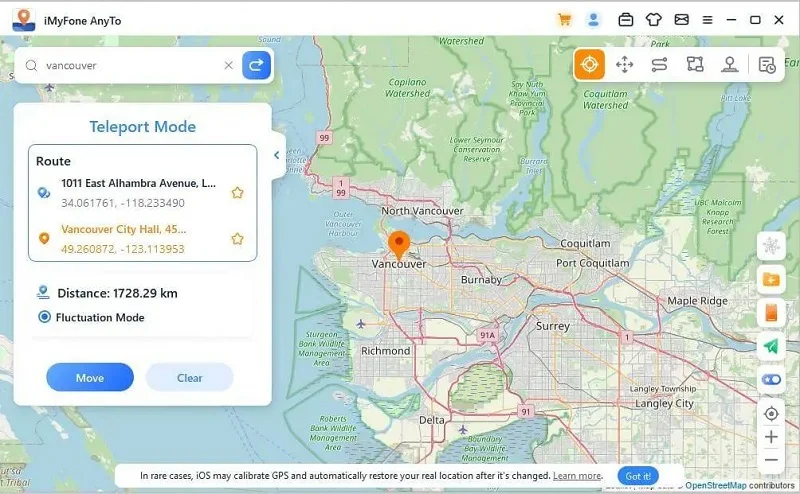
Step 3: Enter the address or coordinates you want to change your location to in the search box, then click the “Move” button. Your location will be changed immediately.
Below is a list of the best places in the world to catch the ultra-rare Pokémon.
1. Circular Quay, Sydney, Australia
There are thousands of Pokémon all over Circular Quay, and many people spend time playing the game together here. You can change your location to hunt your most treasured Pokemons.
2. Big Ben or Savoy Hotel, London, United Kingdom
Not only it is the city full of monuments and historical buildings, but also you can find PokeStops at almost every corner. You will also be able to pick up Poke Balls right at the entrance of the Savoy Hotel.
3. Central Park, New York, United States
This is a great location because its vast trees, statures, and lakes make it a top spot for different Pokémon species, especially Pikachu.
4. The Colosseum, Rome, Italy
In Rome, you will find almost every type of Pokémon. At the Colosseum, you can capture different Pokémon.
5. Disneyland, California, United States
This famous spot is also a Pokémon breeding ground. Here, you will have many ultra-rare Pokémon species.
6. State Library of Victoria, Melbourne, Australia
This landmark is a hot spot for Pokémon hunting. You can meet up with other players at the library steps to capture varieties.
You have learned how to install PokeSniper on your Android or iOS devices and use it to snipe rare Pokémon. But if you want to change your location easily and quickly, we suggest you use FoneGeek iOS Location Changer.
As a professional writer who is interested in technology, Edwin J. Parke has helped thousands of users by offering various tips to solve their problems.
Your email address will not be published. Required fields are marked *

Copyright © 2025 FoneGeek Software Co., Ltd. All Rights Reserved